Adding Functionality to Your Site
Modules are Drupal plug-ins that add functionality to your site. Your YaleSite incorporates a comprehensive list of modules necessary to build a fully functional dynamic site. Many modules are enabled when your site is provisioned; other modules can easily be enabled as needed based on your site’s requirements.
Below you will find a list of the most common functionality requested to create dynamic websites. Clicking on the link provides the modules and links to instructions and tutorials necessary to add the functionality to your site. For a full list of modules available on your YaleSite, check the Module Listing.
Check for broken links
You can check for broken links using the Link Checker module. Once enabled, you can configure the module to indicate which Content Type(s) you want checked and how frequently you want to check for links.
Configuring the Link Checker Module
You can check your site for broken links within and outside your site using the Broken links option from the Reports menu:
- Select Configuration > Content Authoring > Link Checker from the Administration toolbar.
- Under General Settings, check the Content Type(s) you want to check for links. If none are checked, all Content Types will be checked for broken links.
- A list of links that are broken display on the page.
- The options to check/fix the links are listed under the Operations column.
- Click on the Edit node # to go directly to the page and fix the broken link.
Checking for broken links
You can check your site for broken links within and outside your site using the Broken links option from the Reports menu:
- Select Reports > Broken links from the Administration toolbar.
- A list of links that are broken display on the page.
- The options to check/fix the links are listed under the Operations column.
- Click on the Edit node # to go directly to the page and fix the broken link.
Configure search
Your YaleSite has basic, out-of-the-box search capabilities that allow site visitors to search your site. These capabilities can be enhanced by adjusting the basic configuration or enabling the Custom Search module.
The Google CSE (Custom Search Engine) module is also supported, allowing for the enabling of a Google Custom Search engine that offers additional customization and the ability to search across multiple sites.
Configuring the GCSE Module
The Google CSE Module is available as part of the YaleSites Module listing. If you do not see the Module listed on your site, please request a refresh and all of the latest Modules will be added to your site.
(Note the Google CSE module should not be confused with the Custom Search module.)
Enabling and Configuring the Google CSE Module in Drupal 7
Before getting started, a customized Google Custom Search Engine must be created using an EliApps account or any Google account. Instructions for creating the Google Custom Search engine can be found here.
- Select Modules from the Drupal 7 administration menu.

- Ensure the Google CSE module checkbox (located in the Other section) is selected as Enabled. Scroll to the bottom of the page and click Save configuration. (Note the Search module is required for the Google CSE module to work and should be enabled by default.)

- From the Drupal 7 administration menu, hover over Configuration and then Search and metadata before clicking on Search settings.
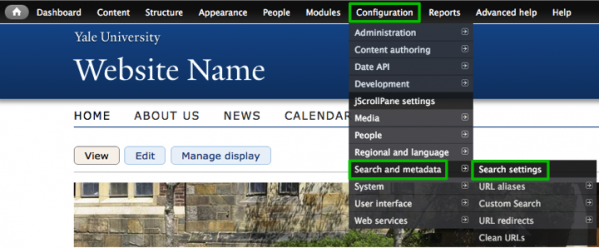
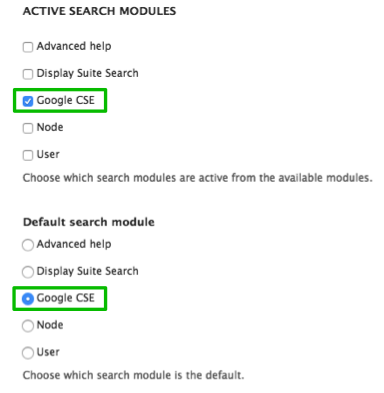
- Choose Google CSE for Active Search modules and Default Search module options. Scroll to the bottom of the page and click Save configuration.
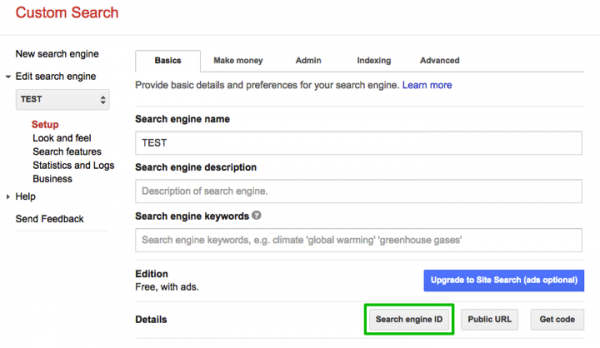
- The Google Custom Search Engine ID will need to be entered to complete the Drupal Configuration. Copy the Search engine ID found on the Google Custom Search control panel (navigate to Setup > Basics tab) to the right of Details.
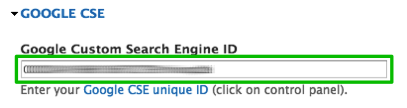
- Returning to the Drupal Search settings menu, enter the Search engine ID in the Google Custom Search Engine ID field located in the Google CSE section.
- Also located in the Google CSE section, uncheck the Search results “Add to Google” Google Gadget checkbox.

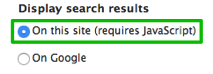
- Next, ensure the On this site (requires JavaScript) radio button is selected for the Display search results option. Finally, click Save configuration at the bottom of the page.
- In the Drupal administration menu, hover over the People menu and select Permissions.

- Finally, ensure the Anonymous User and Authenticated User checkboxes are selected for the Google CSE / Use Google CSE permission and click Save permissions.

- If there are no other active search modules, the generic Drupal Search form block can be added to a region for access to Google Custom Search results.
Congratulations! Your new Google Custom Search engine is now configured as the active search module on your Drupal 7 site.
Refining Search Results with View Modes
YaleSites utilizes the Drupal Core Search feature that allows site visitors to search using keywords that are found on your site. However, what if you want a specific page to display when a related keyword is used to Search but that keyword is not used on a page within the site? You can add a hidden field to any Content Type and expose that field only in the Search Results and Search Index View Modes. This will allow you to add terms that are not part of a page but related to the content to ensure that page displays in the search results if the keyword is used in the search.
What are View Modes?
View Modes is a Drupal Core feature that allows you to control what is seen or utilized on a page display based on the context in which it is viewed – i.e. full pages or teasers. Additional View Modes are available based on the Modules you have enabled.
Standard View Modes
The following lists the View Modes that are available as part of Drupal Core:
- Full content: This is normally used only when visiting the URL for a particular node.
- Teaser: This is used on two list types – the front page and taxonomy term lists.
- RSS: These settings are used when including the node in RSS feeds.
- Search index: This is used when Drupal’s Search module indexes content on the site. Fields that are hidden in this view mode will not be searchable.
- Search result: This is used when presenting search results on the website.
In this tutorial we will focus on the Search Index and Search Result View Modes to optimize the search results for your site using the Search and Custom Search Modules.
Creating a Keywords Field
The first step to optimizing your search results is to create a Keywords field. Here you will place words that describe and give information about other data but are not found within that specific page.
- Structure > Content Types > choose a specific content type > Manage fields
- Add a Long Text type field, call it Keywords and use the default values.

Configuring View Modes
Configuring View Modes is fairly straightforward regardless of the Module enabled. View Modes can be found as part of the structure of a Content Type in the Vertical Tile labeled Custom Display Settings.

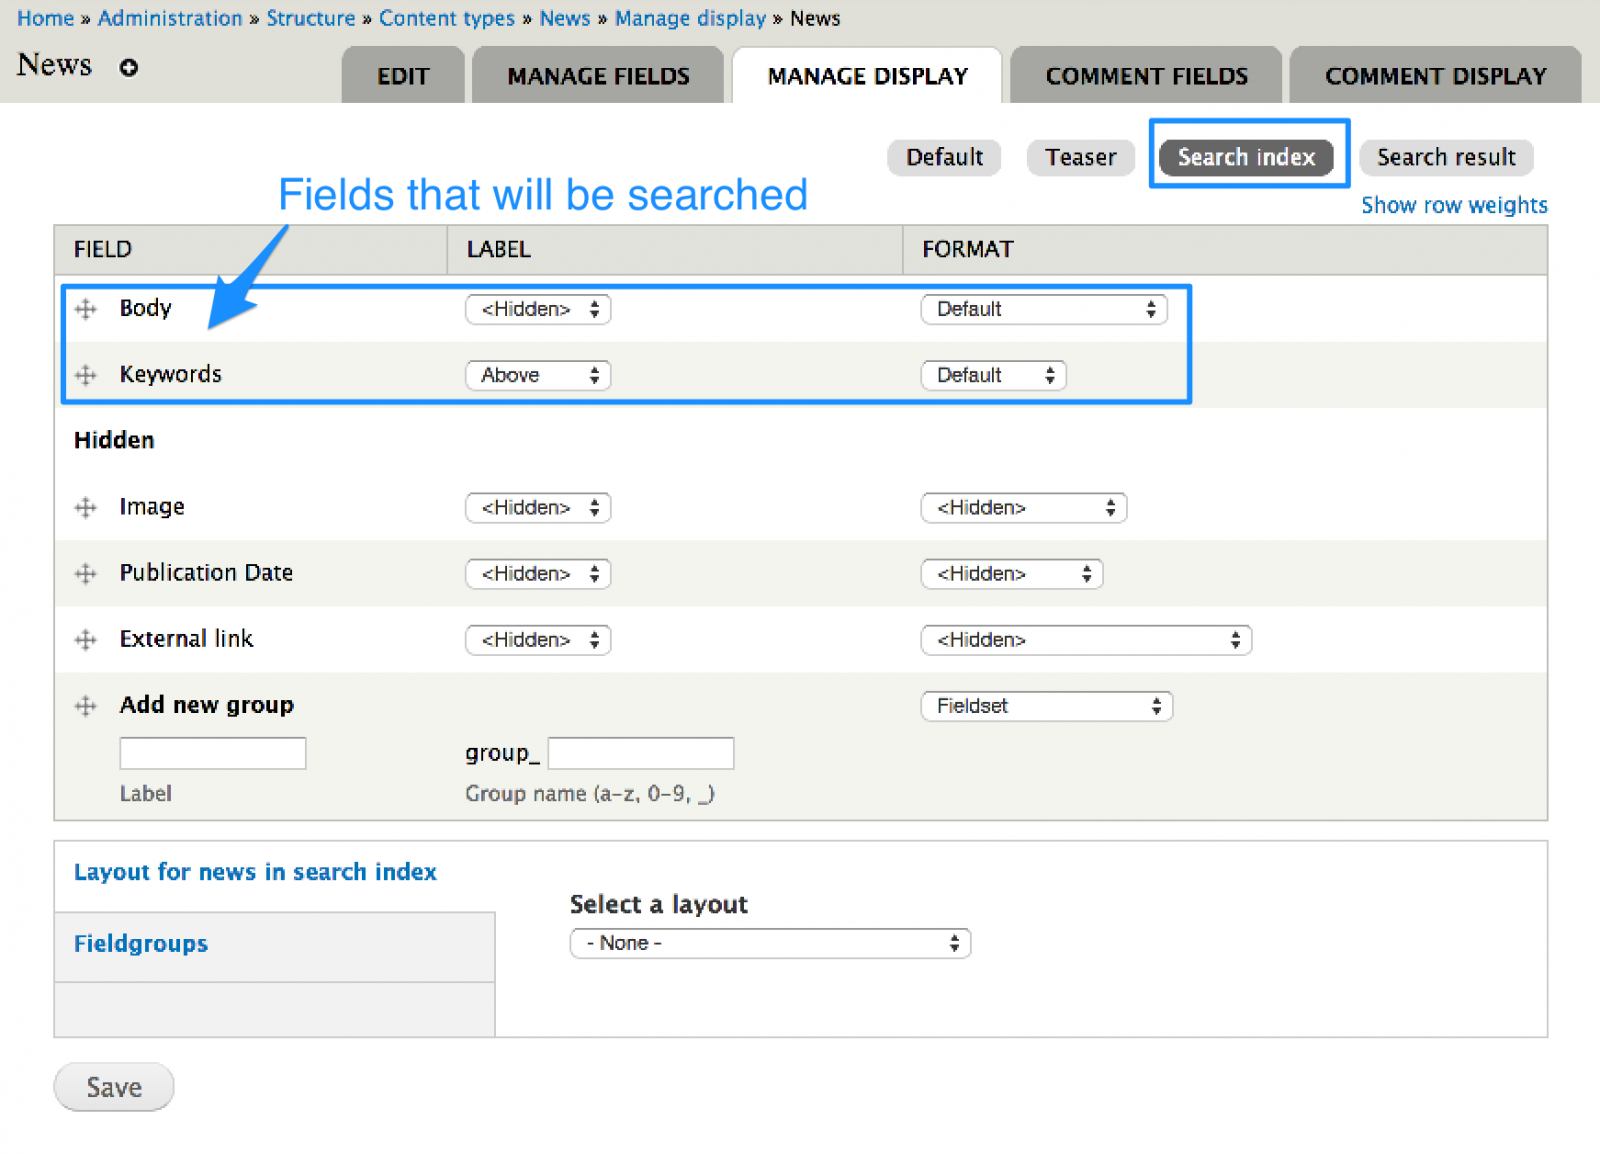
Click on the Search Index and Search Result check boxes and save the configuration. You will notice new tabs at the top of your Manage Display configuration page.

Click on each tab and drag the fields that you do not want in to search to the Hidden section. In this example, we will only display the Body and Keywords field, all the others are in the Hidden section. Save the configuration.
Do the same for the Search Results View Mode.

Re-indexing your Site
The site will need to be re-indexed in order for the search results to display. This happens automatically overnight but may take more than one night depending on the size of your site.
Creating a book
You might have a manual, guide or other structured documentation that you want to use as a separate a set of pages on your site. The Book module provides the interface that allows you to create a book with pages are tied together in a hierarchical sequence. The Module includes navigation that links to the next and previous pages, as well as a Table of Contents that lists the chapters, sections, subsections based on your outline.
Site statistics & analytics
For analytics gathering and reporting, Yale University recommends all YaleSites use Google Analytics. In order to use Google Analytics, the site administrator must enable and configure the Google Analytics module to begin tracking site usage.
Monitor site activity
Several reports are available to help you monitor the activity of your site. These reports can be accessed from the Reports link in the Administration menu then selecting the desired report.
Recent Log Messages - lists site activity including page creation and updates, module configuration, notices and warnings. Each message is stamped with the date, user, and link to more information.
Top ‘access denied’ errors - lists the pages anonymous users were restricted from viewing along with a number of times that error displayed.
Top ‘page not found’ errors - lists the URL that leads to the 404 page, indicating the page could not be found as well as the number of times this error occurred.
Editorial workflow
You may want to manage your website maintenance process with a more formal workflow structure. This would allow you to define your workflow states, (i.e. “draft”, “ready for review” and “published”), as well as assign permissions to the various individuals who will be responsible for working on your site’s content (i.e. “editors” can only update but not publish content). Workbench is a suite of modules that provides all the tools/modules necessary to create the workflow states and permission levels.
Restricting Access to Pages and Files
How to Manage Who Sees What on Your YaleSite
We’ve had a lot of requests for more information on restricting or controlling access to content. This is relatively easy to do with YaleSites using the right module combination:
Roles and People Management
YaleSites allows you to control who can edit/view content with roles. Out-of-the-box, anonymous and authenticated users (anyone with a NetID) can view your site; the Editor, Site Builder, Administrator roles all have varying degrees of access based on the permissions granted. These permissions can be customized based on a site’s needs. Read More…
Restricting Access to Specific Pages or Sections
The Content Access Module gives you a way to control who can view or edit content for specific Content Types or individual pages/nodes on your site based on roles. Read More…
Restricting Access to Uploaded Files
Although the Content Access Module allows you to restrict access to pages or sections of your site, this alone does not prevent someone from viewing or downloading PDFs or other files that have been uploaded to your site. In order to prevent access to files, you need to configure the Private File settings and the Content Access module. Read More…
CASifying a Page
There may be times when you want to limit a page or webform to the internal Yale community. You can easily redirect someone to CAS prior to opening a page or webform using the CAS module. Read More…
Password Protecting a Page/Node
Need to restrict access to a small group that includes users who are outside the Yale community? Since these users do not have NetIDs, they can’t log in or be assigned a role. In these cases, you can use the Protected Node module to create a password for distribution. Read More…
Restrict access to pages/sections
You can easily restrict access to specific pages or sections of your site using the Content Access Module. This allows you to provide access to view and/or edit content for a specific content type based on a user’s role. In addition, you can provide permission to specific pages on an as-needed basis, in the event that only one page of a specific content type requires restriction.
Since the use of multiple user access modules can create conflicts, YaleSites will only offer the Contact Access module as the option to restrict/grant access to users. For instructions on how to configure this module, please visit the Content Access module page on the YaleSites How-To Guide.
Restrict Access to Uploaded Files
You can restrict access to pages on your site using the Content Access module, but this does not prevent anyone from viewing files that have been uploaded on those pages. In order to so this, the field used to upload the file needs to be set as “private” when it is created. Some site configuration must be done to make the private option available.
- Configure the site to allow Private Files
- Create the Private File Content Type
- Indicate which roles you want to view content created with the Private File Content Type.
Private Directory Configuration
The first thing you need to do is configure the Private directory on your site.
- Go to Configuration > Media > File System
- The Private file system path field is blank.
- Enter the following path in the field sites/default/files/private (required, directory name must be called private)

- The Private directory is now available for your site with an .htaccess file that prevents access to anything in the file without the proper permissions.
Private Files Content Type
For files that require restricted access, create a Private Files content type. This is the Basic Page content type but with the “file upload” field set to “private”. Once created, you need to set permissions to allow specific roles to view any of the content on that page, including the uploaded files.
- Create a Content Type (Structure > Content Types > Add) and configure based on your requirements.
- Add a File Field to upload the type of file(s) you would like.
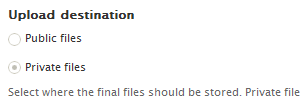
- When configuring the field, scroll down to the bottom of the configuration page and select the Private files radio button.
- Save the Configuration.
Assigning Access to the Content Type
The Private Files cannot be viewed when they are in the private directory unless access is provided to the content type the file is associated with. Therefore, you need to set access permissions to the Private Files content type using the Content Access Module in order to allow anyone to see and/or download the file.
- Open the Private File Content Type and click on the Access Control tab.
- Adjust the permissions to allow the roles you want to view/edit this page.

The downloadable file that is attached to this file takes on the permissions of the permissions set here.
Please note: the Lynda.com video describes how to set up a Private file directory and create a Private File content type. This is not necessary. You do not need to create/or change the Private File system path. This has already been set up as part of your YaleSite.
Surveys, polls, registration forms
There are several ways to collect information from site visitors to solicit opinions, gather information or register people for an event.
Surveys: If you want to create surveys or gather information from site visitors, you can use the Webform module. This allows you to capture information and send it to designated email addresses. The submissions are available to be downloaded via Excel or viewed directly on the website.
Polls: The Poll module allows you to create simple polls and display the results on your site in a Block.
Contact Us: Use the Contact module to setup online contact forms with multiple topics; each can be configured independently to identify the email subject, body and email address to receive the information.
Five Star: Implement Voting on specific pages.
Blogs
A blog is a group of web pages that are arranged in the order and grouped by a specific topic or relevant terms. Blogs are not much different than websites, but there are some subtle differences:
- Blogs are updated frequently, with chronologically-ordered, dated posts. A website is usually more static with information about the department or organization is represents.
- By default, blogs allow the reader to interact with the content, posting comments to the individual articles and even linking from your site to their content.
- Content is usually categorize by topic using taxonomies.
- Blogs can allow a variety of authors to to post content.
Enable the Blog module
- Go to Modules > Blog
- Click on the check box and scroll down to the bottom of the page and click on the Save Configuration button.
The Blog post content type is now be available and any entries you make will display at the following URL: yoursite.yale.edu/blog
Managing Blog Categories
You create categories for your Blog, with taxonomy. See Creating Categories with Taxonomy.
Comments
It is very common to allow site visitors to comment on Blog entries. This is possible when permissions are set prior to the blog entries being created. For more information visit Managing comments.
Important note: If your blog allows multiple authors and/or site visitors to comment on your site, it is recommended you put a disclaimer statement to the effect that the opinions expressed on the Blog are not necessarily those of the organization/department hosting the site. Additionally, the group hosting the Blog must regularly review or moderate content and provide ways for people to report inappropriate posts. It is recommended that each organization/department provide a statement from that content will be removed at the discretion of the organization/department .
Adding FAQs
The Frequently Asked Questions module (FAQ) provides an environment to capture and organize Questions and Answers for your site. The Module allows you to create, change the order and layout, and use taxonomy to create an FAQ category.
Protect email from spam
If you are including email addresses of staff or faculty on your site, there is the risk that a spam-bot can harvest the addresses, increasing the spam found in in-boxes. To prevent this, you can use the Invisimail module to configure the email fields to be hidden from spam-bots.
Here’s how it works**:
Invisimail scans content for email addresses and then converts each character of the address to its ASCII-code equivalent. The email address will appear normally on the page, but the source html will not appear as an email address. For even more security, the filter can use a JavaScript write command to further obscure the email address.
** taken from the Advanced Help Readme.txt file which is available when you enable the Invisimail module.
RSS and feeds
YaleSites allows you to provide a summary of key information from your web site as an RSS feed. You can create links to these feeds within your site or site visitors can subscribe to your feed.
Each site an automatic RSS feed that can be found at yoursite.yale.edu/rss.xml. This feed lists any page that has been checked as Promote to Front Page under Publishing options.
Configuring your RSS feed
You can create settings for all your RSS feeds by following these simple steps:
- Select Configuration > Web Services > RSS publishing
- Choose the number of items in each feed
- Choose how you want the content to display in the Feed content drop down (Full text, Titles or Titles plus teaser)
IMPORTANT NOTE: The date that displays in the RSS feed is the DateStamp, or the date the page/node was created. You can change the date field in the Authoring Information field to the true published date if you wish.
Creating an RSS Feed with Views
We get many requests from site builders that want to provide an RSS feed that lists content from their sites. The RSS feed provides a list of links for designated content (most frequently news and events) to display on a browser or phone. People can subscribe so they can view the list that is updated automatically as content is added to the site.
Creating an RSS Feed with YaleSites can be done with a few adjustments to the News and Events pre-built features. For this example we will use the News Content Type and View.
News Content Type Adjustments
RSS format is very simple, displaying just a Title, description, author, and publication date. Most of the fields that you need for an RSS feed already exist in the News Content Type, but you will need to add the Path and Author fields in order to capture that information.
Creating the RSS Feed with Views
The Views Module provides RSS Feed as one of the display options. This makes it relatively easy to create an RSS feed for your site. You just need to set the filters and fields based on the RSS format.
In the News View:
Be sure to apply theses changes to This display
- Choose Feed from the Display drop-down in the views interface.
- Click on Content

and change that option to Fields
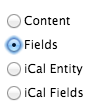
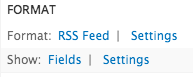
You will be asked to override the fields, but first you need to adjust the fields in your list so that it includes only the fields that are part of an RSS Feed. Just click Cancel and you will return to that after your fields are adjusted. The Format section will look like this:
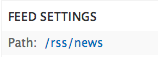
- Go to the Path Settings section in the middle panel of the View and enter a path i.e. rss-news
- Go to the Fields section of your View.
- Delete the Image field.
- Click on the Title field.
- Set display to settings to
- Uncheck the Link this field to original content
- Make sure Strip HTML is checked.
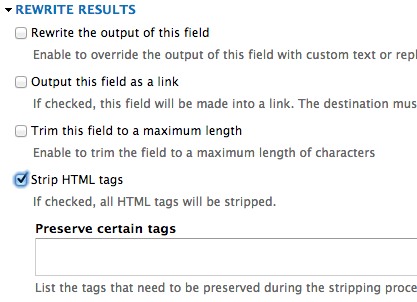
- Click on the Description field.
- Make sure Strip HTML is checked (see image above)
- Set display to settings to
- Click on the Add button and add the Path field to link to the content.

- Make sure Strip HTML is checked (see image above)
- Uncheck label at top.
Creating the Date Format
The YaleSites News Feature comes with a date field, but the format needs to be adjusted. Because the RSS feeds uses the RFC 2822 date format, your date field needs to be formatted in order for it to be accepted. You can to create the format in the following way, then assign it to the View.
- Choose Configuration > Date and Time
- Click the Formats tab to add the Date format
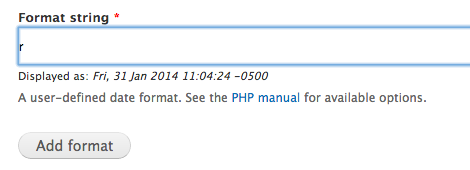
- Choose r from the PHP Manual (click to enlarge)

Type the lower case r in the Format string field and click Add format.
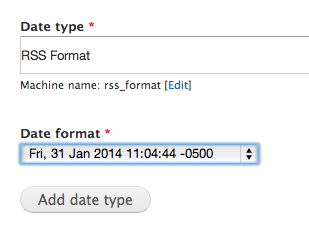
- Click Types to create a new type and assign the new format
- Give it the name RSS format and choose the new date format.
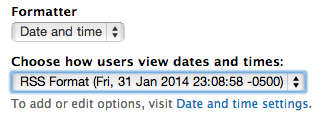
- Go back to your view and assign the date format to the Date field. Click on the Date field and choose RSS format from the list.
- Format is better but still has HTML. GO into the view and strip the HTML tags (UNCHECK THE CHECK BOX SEEN BELOW).
Adding the Author Field
Each piece of content that is added to your site is stamped with an author, or the person who created the page. This information is part of the People Profile so it is not added directly to the News Content Type. Therefore in order to associate the Author field with the News Content Type, a Relationship must be created.
Creating the Relationship
- Click on the Advanced link in the far right panel of your Views interface.
- Locate the Relationships section and click on Add.
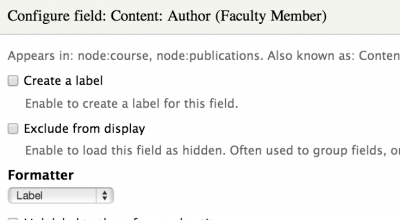
- Locate the Content:Author field, click on the check box, then scroll down and apply to This Display.

Adding the Author Field
Now that you have the relationship you can add the Author field in the Field section
- Click on Add in the Field Section
- Locate the User:Name field
- Click on the check box, then scroll down and apply to This Display.
- Uncheck the Link this field to its user check box.
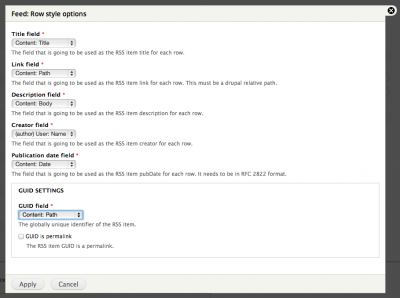
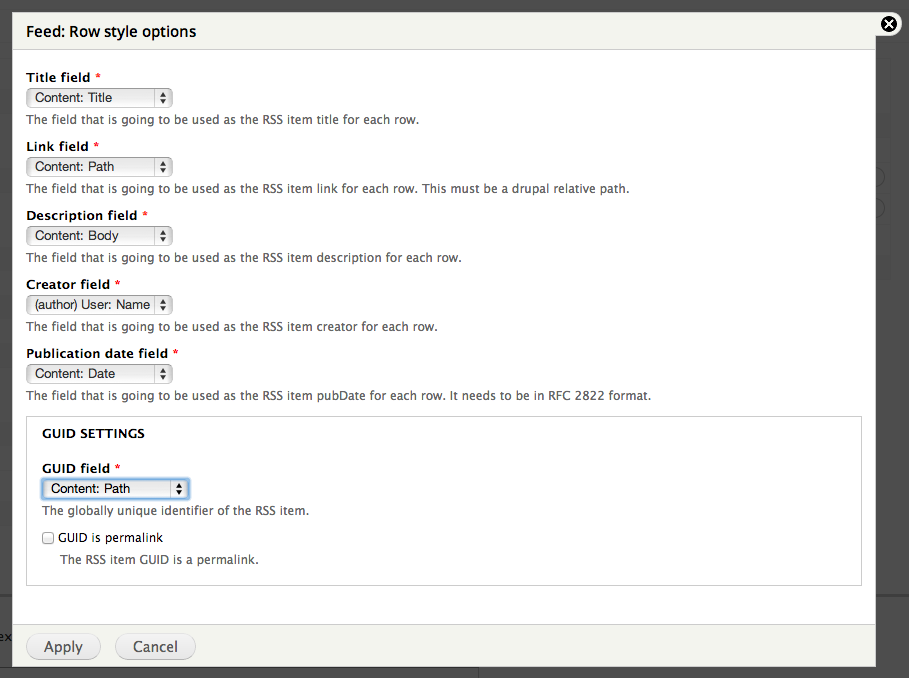
Go back and Setup the RSS Field Mapping
- Click on Settings next to Field under FORMAT and map the following:
- Title > Title
- Link field > Content:Path
- Description field > Content:Body
- Creator field > (author) User:Name
- Publication date field > Content: Date
- GUID Settings > Content:Path GUID field – unique identifier – typically the path is unique so that’s a good one to use.
Attaching an RSS Image to the News display
Once you have created the feed, you might want to attach an RSS icon to the main news listing so people can easily subscribe to it. This is relatively easy to do.
- In the middle pane of your Views Interface, click on None next to Attach to
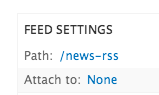
- Click on the checkboxes next to the pages you want to attach the RSS image.
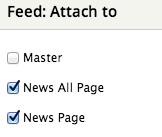
- When you save the View, an RSS feed icons displays at the bottom of the news listing.
Additional RSS Feeds Based on Taxonomy Tags
You can also add additional filters through the Filter section of your Views interface or using Contextual Filters.
Helpful Hints
- Always view the preview to make sure the RSS is displaying correctly.
- If odd characters are showing up, enable Strip HTML tags in the Rewrite the Output section of the field configuration.
- For even more control use the Views RSS Module.
Import an RSS Feed with the Feeds Module
If you want more control over the content that is pulled into your site from an RSS feed or you want to integrate the articles with current content (i.e. News, Videos) you can import RSS feeds to your site using the Feeds Module. The example below provides instruction for how to import an RSS Feed from news.yale.edu into the YaleSites News Feature Content Type. Important Note: If you want to pull the image from the news feed you must use the jSon Feed option.
Create a Content Type
The RSS or data feed imports the data into a Content Type; you must create a Content Type if you do not already have one.
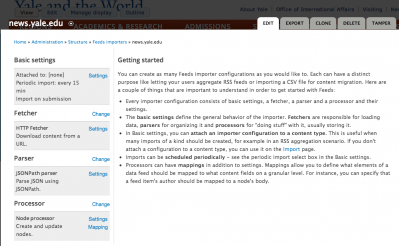
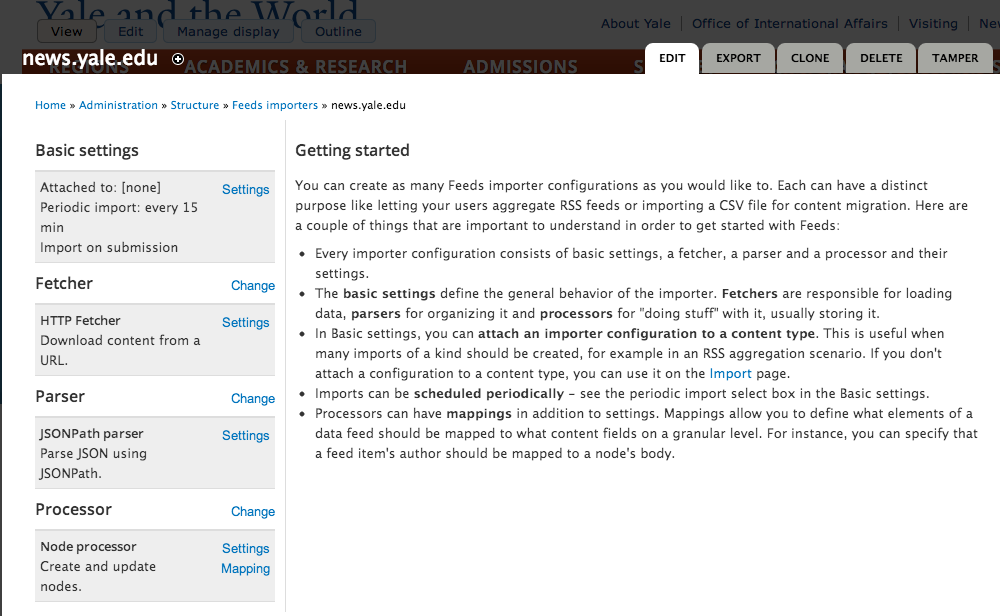
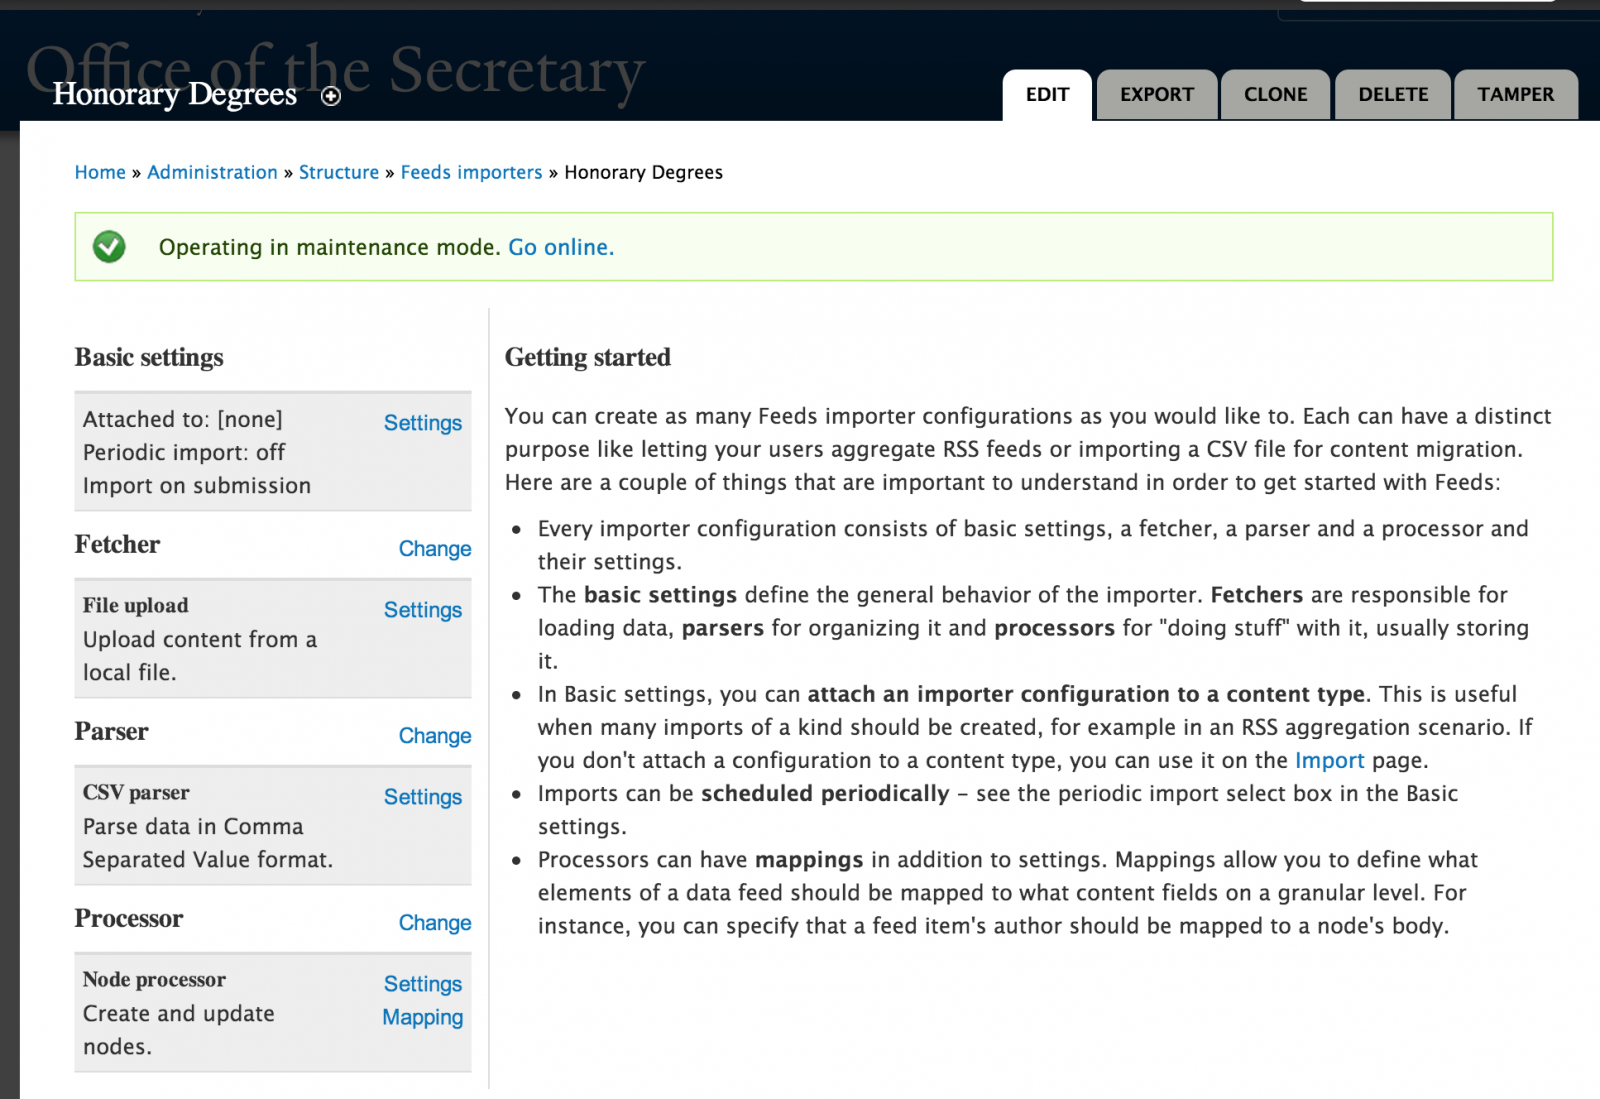
Creating the Importer
- Enable the Feeds Admin UI module (the Feeds Module is enabled by default).
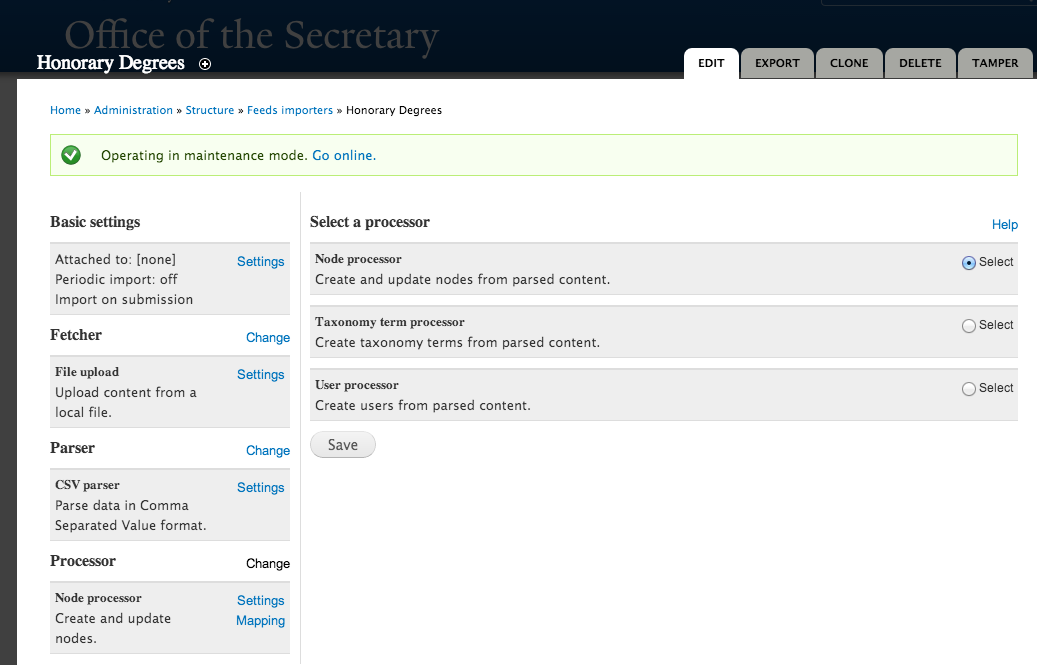
- Select Structure > Feeds importer > Add importer
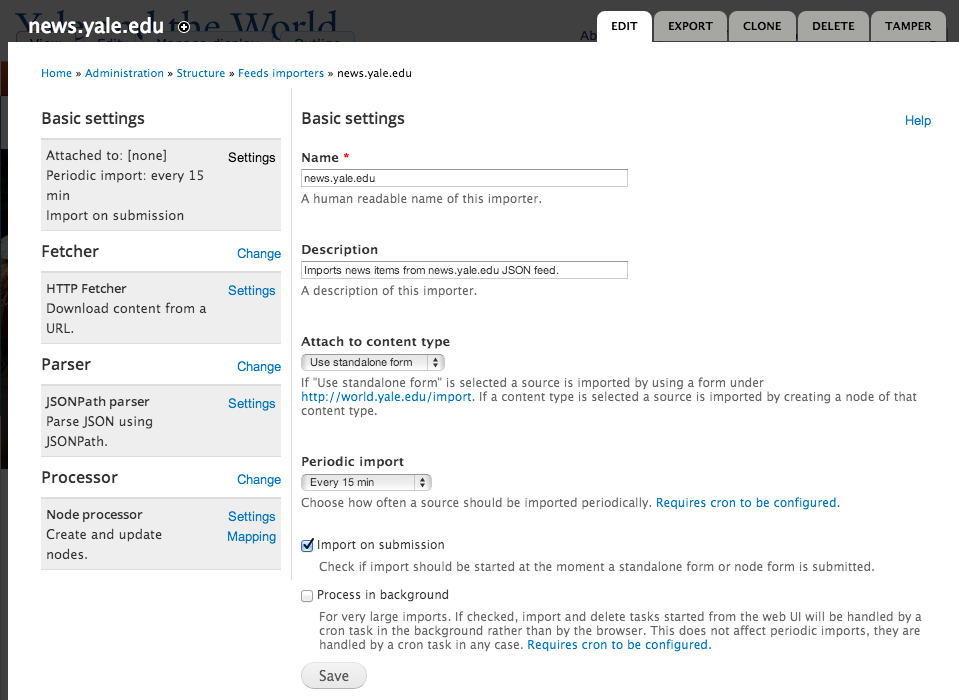
- Give the importer a Name and Description and click Create.
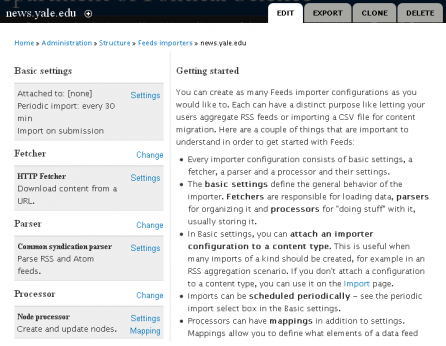
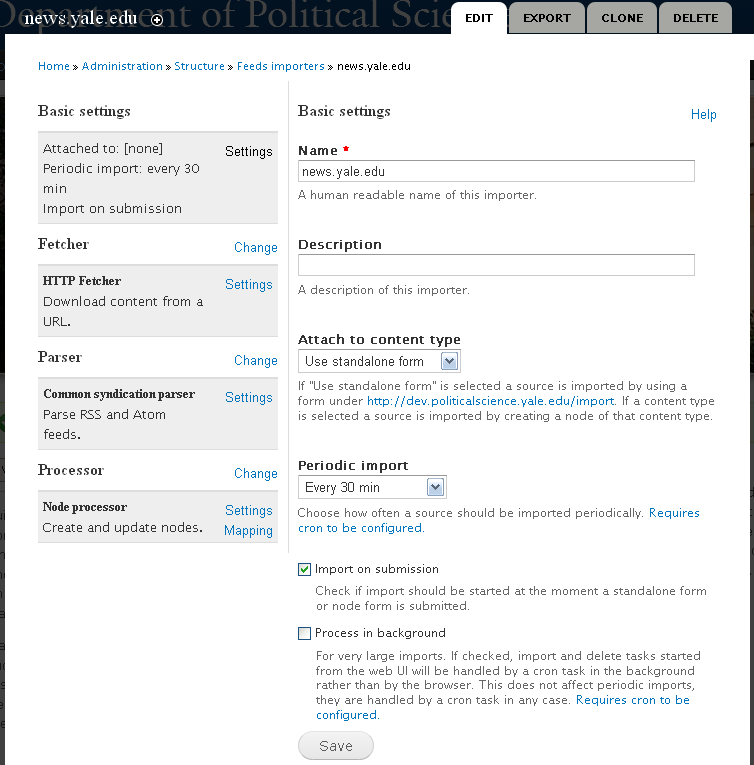
- Click on Settings in Basic settings section and only change the Periodic import if desired. This determines how frequently the importer pulls articles from the RSS feed.

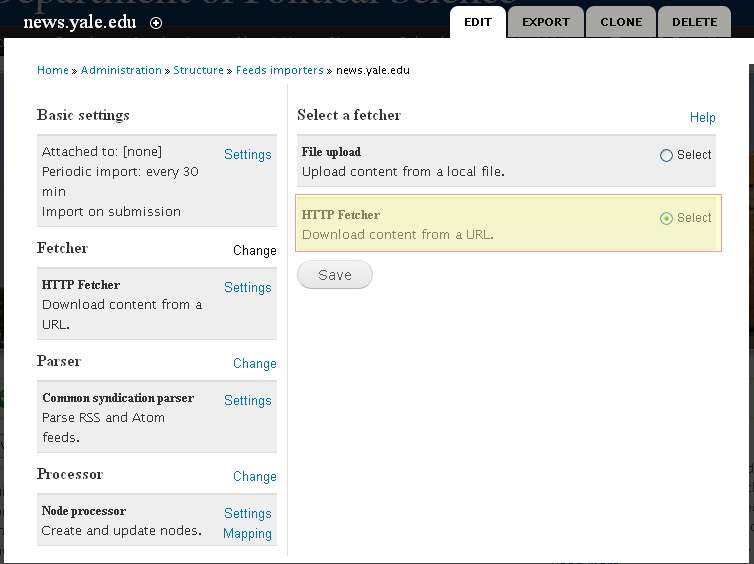
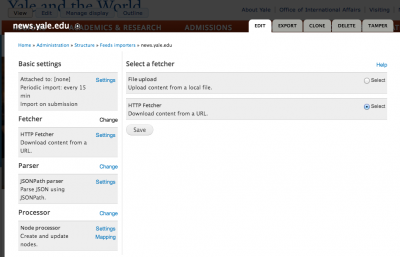
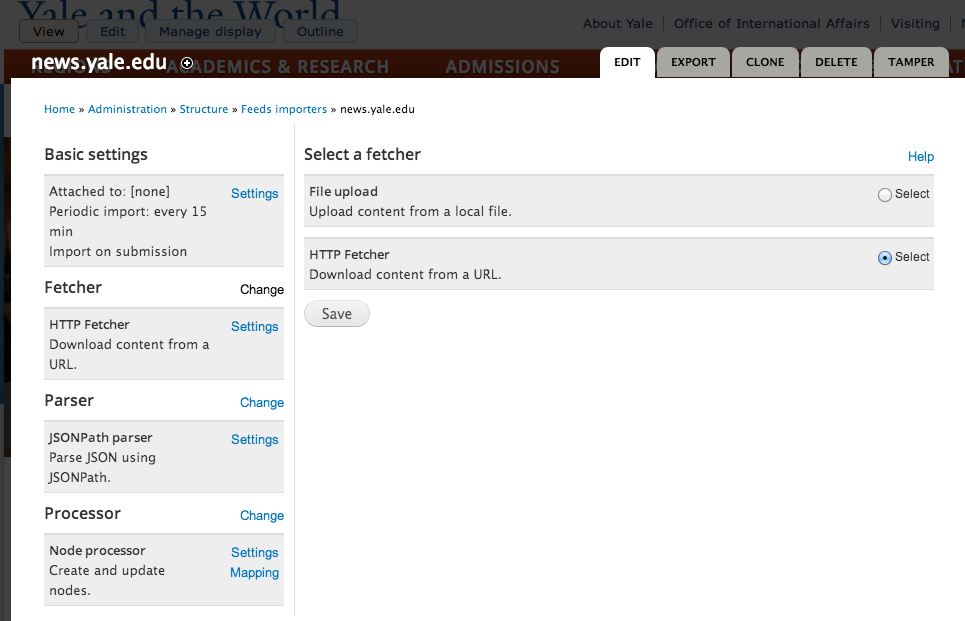
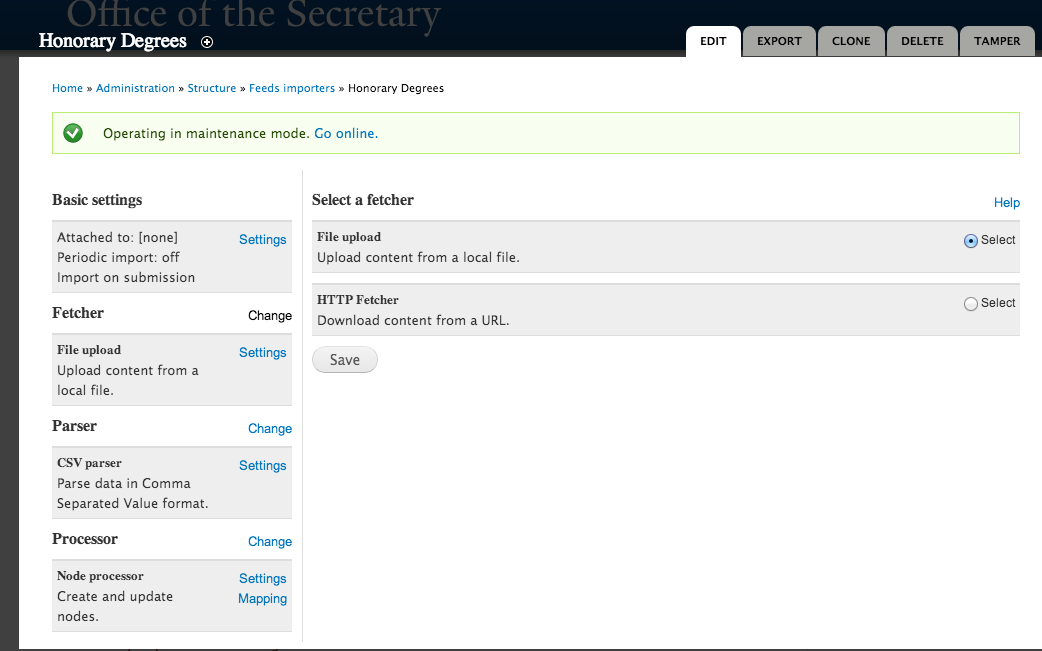
- Click on Change in Fetcher to select the method to pull the feed. To pull RSS feeds, use HTTP Fetcher.

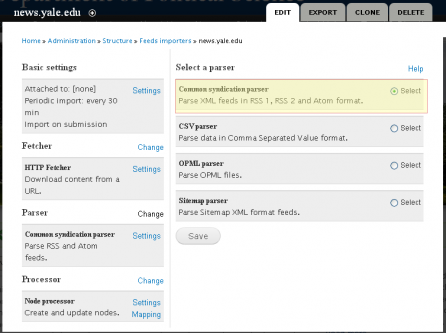
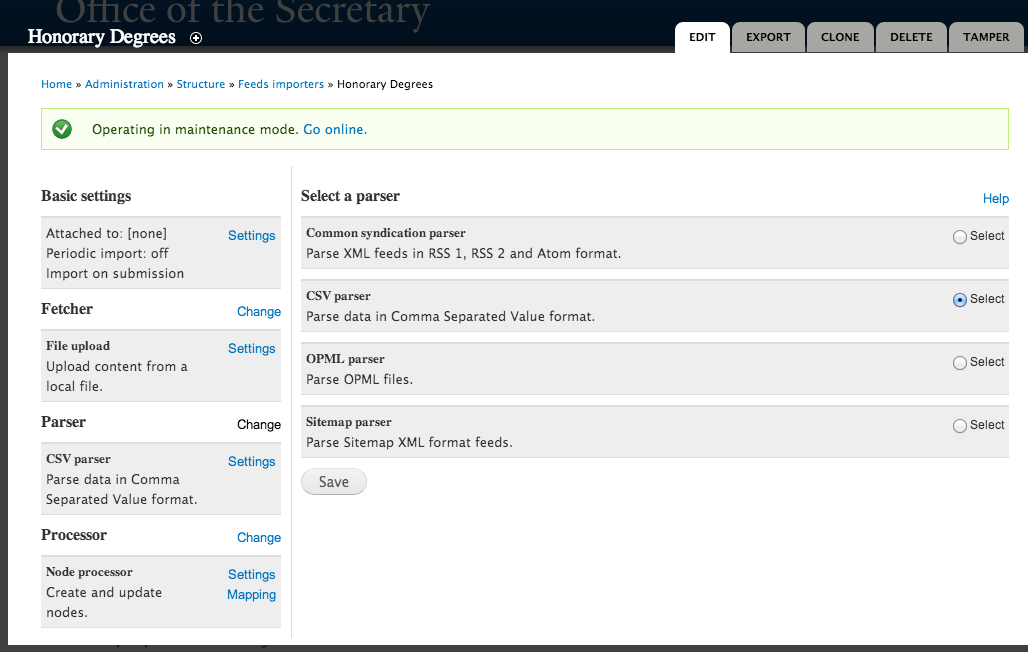
- Click on Change in Parser and select the Common syndication parser.
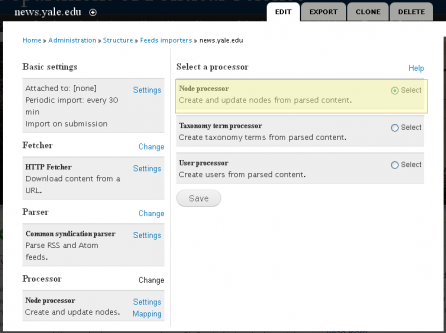
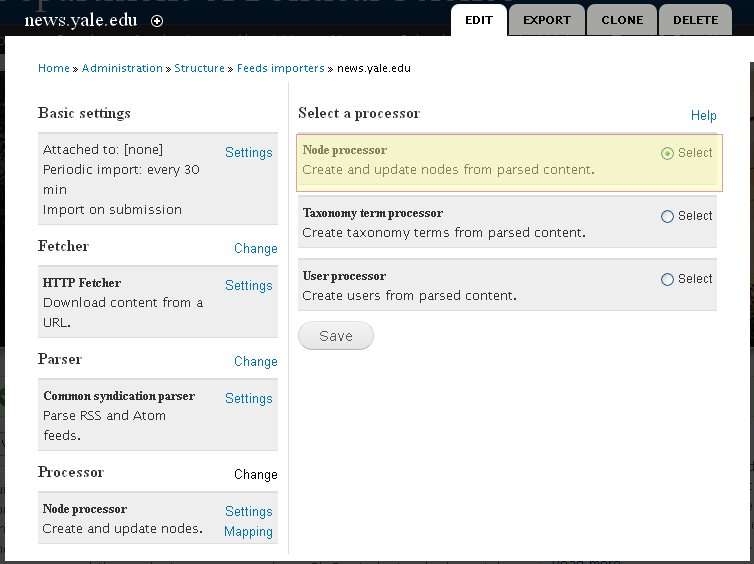
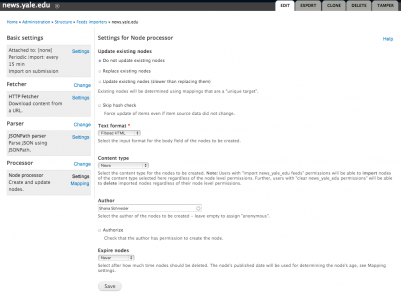
- Click on Change in Processor and select the Node processor (to pull content into a specific Content Type).
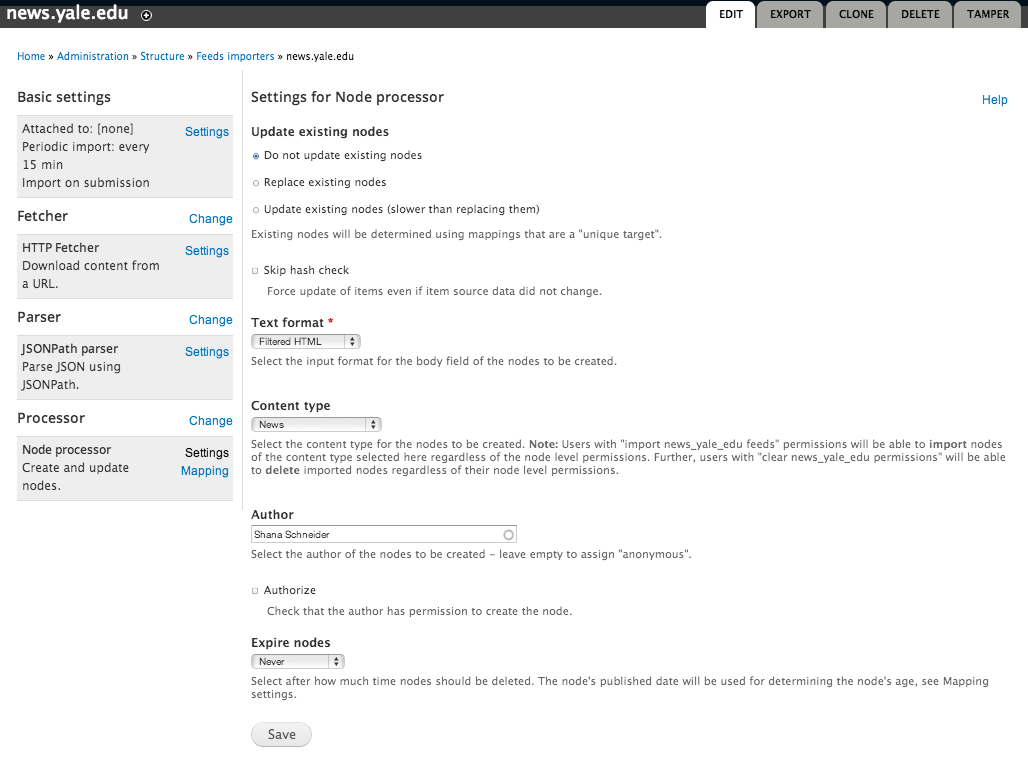
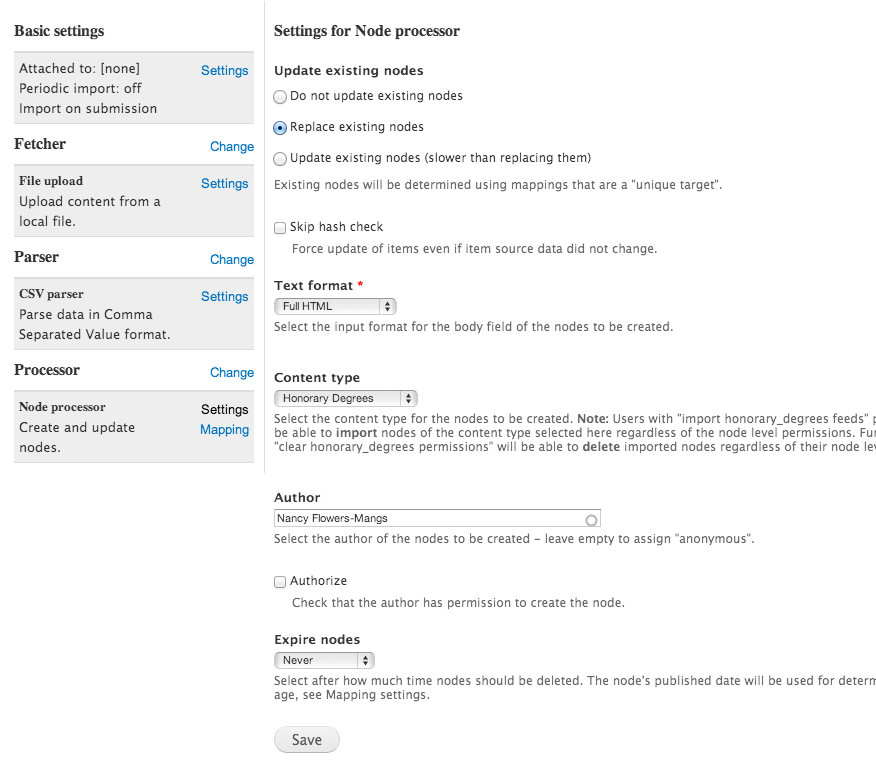
- Click on Settings in Processor and select the News Content Type to pull the RSS content into. Important Note: It is recommended that you uncheck Published in the Publishing Options so imported items are not available to the public.
- Change the Author to someone assigned administrator privileges on your site. DO NOT leave Anonymous.

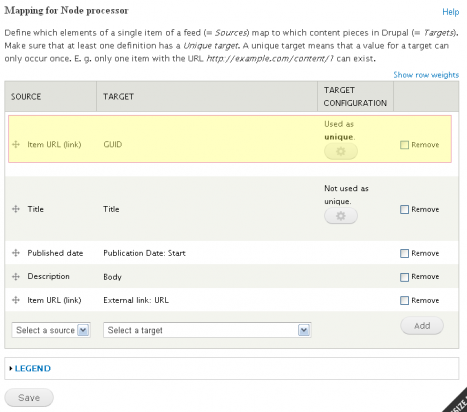
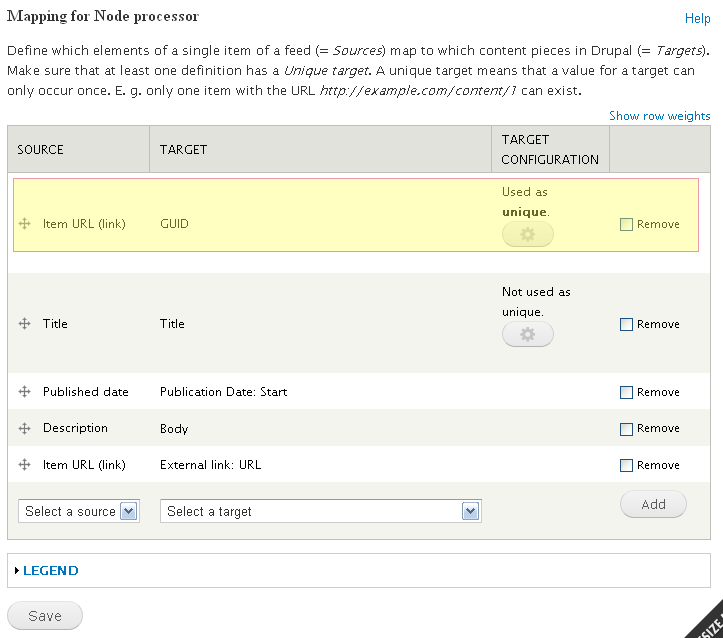
- Click on Mappings in Processor and match the Source fields (from RSS Feed) to the Target field (to the News Content Type). Important Note: At least one field must be unique. The URL or Title are recommended unique fields.


Import the RSS Feed
Once you have created the importer, you can indicate the RSS feed to pull in and import the RSS feeds.
- Go to http://sitename.yale.edu/import
- Click on the Importer you have created (in this example, news.yale.edu).
- Enter the URL for the news feed.
Importing News with a jSON Feed
Yale News (news.yale.edu) is the main source of news related to the academics, research and community activities. You can include articles from the Yale News site in your news listing by importing one of the Yale News jSON feeds with the Feeds Module and making a few adjustments to the News Content Type.
- YaleNews: All topics - http://news.yale.edu/news-json
- Arts & Humanities - http://news.yale.edu/topics/arts-humanities/json
- Business, Law, Society - http://news.yale.edu/topics/business-law-society/json
- Campus & Community - http://news.yale.edu/topics/campus-community/json
- Science & Health - http://news.yale.edu/topics/science-health/json
- World & Environment - http://news.yale.edu/topics/world-environment/json
While you can use the basic RSS Feed to pull this information, you won’t have a lot of control over what is pulled into your site. For the most part, you can import the title of the article, the description and the date. If you want to exercise more control and import the picture, you can use a jSON feed.
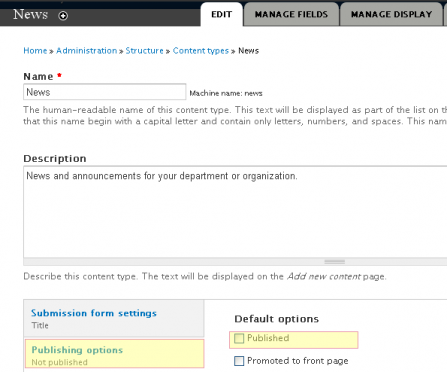
Adjust the News Content Type to set incoming articles to unpublished
By default, the news articles created with the News Content Type are published. However, once you setup the jSON feed to import articles into the News Content Type, you’ll most likely want to monitor how and when they are published.
- Select Structure > Content Types > News
- Scroll down to the Vertical Tabs and click on the Publishing Options tab and uncheck the Published checkbox.
- Set the External Link field to redirect to the url for the news article.
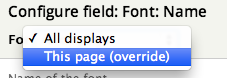
- When an article is imported, it creates a page, but you most prefer the link point directly to the actual news article. You can do this using the Field Redirection Module. Just enable the Module and configure the field based on the image below:

- When an article is imported, it creates a page, but you most prefer the link point directly to the actual news article. You can do this using the Field Redirection Module. Just enable the Module and configure the field based on the image below:

Create a jSON importer with the Feeds Module to pull in the news articles
In order to pull in the entire feed, including the image, we need to use the json feed setting when creating the feeds importer.
- Enable the Feeds UI Admin and JSONPath Parser module (the Feeds Module is enabled by default).
- Select Structure > Feeds importer > Add importer
- Give the importer a Name and Description and click Create.
- Click on Settings in Basic settings section and only change the Periodic import if desired. This determines how frequently the importer pulls articles from the jSON feed.

- Click on Change in Fetcher to select the method to pull the feed. To pull RSS feeds, use HTTP Fetcher and Save.
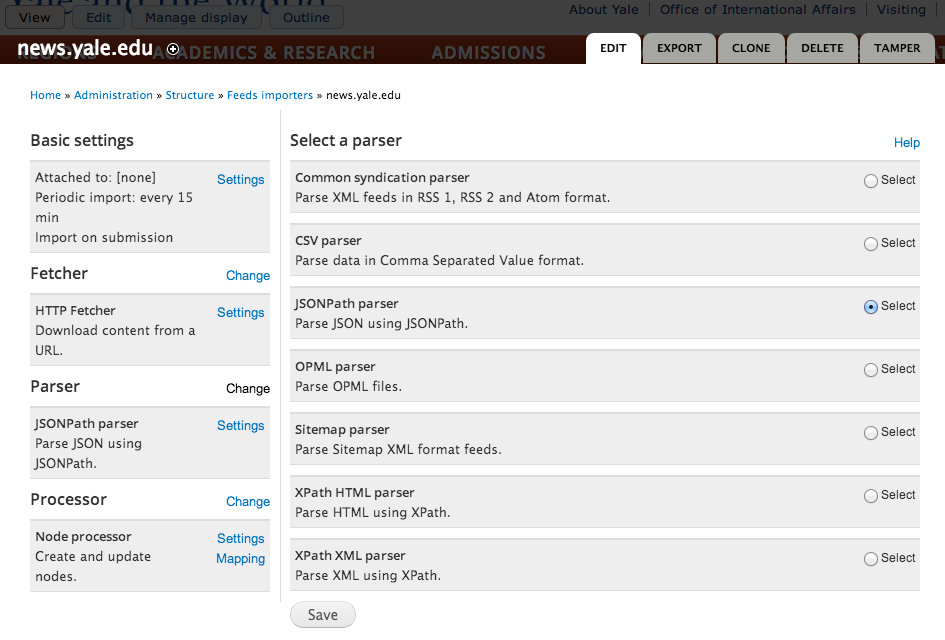
- Click on Change in Parser and select the jSONPath parser and Save.

- Click on Settings next to JSONPath parser/Parse JSON using JSONPath and click on Select.
- Then jump down to the Processor section and change the Node processor settings and Mappings.
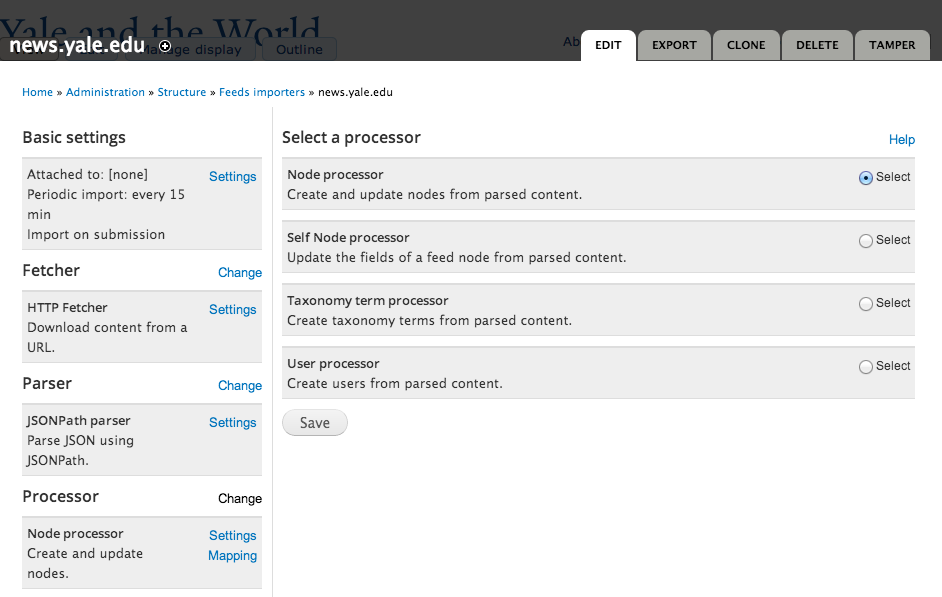
- Jump down to Processor and click on Change; select the Node processor (to pull content into a specific Content Type).

- Click on Settings in Processor and select the News Content Type to pull the content into and Filtered text into the Text format.
- Change the Author to someone assigned administrator privileges on your site. DO NOT leave Anonymous.
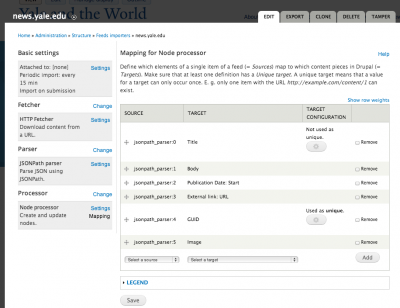
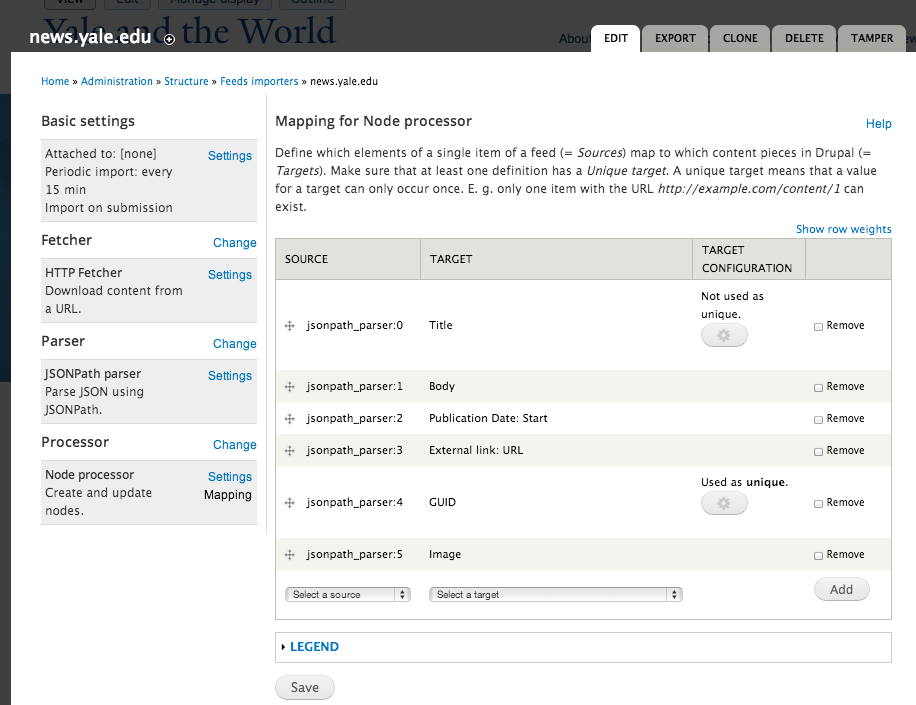
- Then click on Mapping to set the target to match the source during the import:
- Select JSONPath Expression from the Source dropdown then select the field you want to map to in the Target column. The source will display as jsonpath_parser:0 and then the field name next to it.
- Create the fields in the following order:
- jsonpath_parser:0 Title
- jsonpath_parser:1 Body
- jsonpath_parser:2 Publication Date: Start
- jsonpath_parser:3 External link: URL
- jsonpath_parser:4 GUID (Set as unique)
- jsonpath_parser:5 Image
- Your settings should look like this:
- Go back up to Parser, and change the JSON Path Parser settings as follows (see image for exact details). Be sure to Save when you are done.
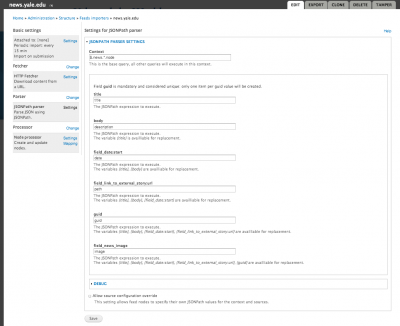
- Context: $.news.*.node
- title: title
- body: description
- field_data:start: date
- field_link_to_external_story:url: path
- guid: guid
- field_news_image: image
Import the jSON Feed
Once you have created the importer, you can indicate the jSON feed to pull in and import the jSON feeds.
- Go to http://yoursitename.yale.edu/import
- Click on the Importer you have created (in this example, news.yale.edu).
- Enter one of the URLs for the news feeds:
- YaleNews: All topics - http://news.yale.edu/news-json
- Arts & Humanities - http://news.yale.edu/topics/arts-humanities/json
- Business, Law, Society - http://news.yale.edu/topics/business-law-society/json
- Campus & Community - http://news.yale.edu/topics/campus-community/json
- Science & Health - http://news.yale.edu/topics/science-health/json
- World & Environment - http://news.yale.edu/topics/world-environment/json
Publishing Imported Articles
Once the news items are imported, you can choose the ones you want to publish, upload an image and click on the Published checkbox to make it live.
Calendar Features
YaleSites provides 2 Feature that enable you to capture your events to display on your site – the YaleSite Calendar Feature and the Yale Bedework Calendar Feature.
YaleSites Calendar Feature
The Calendar feature provides a way to add your events to your site and list them in various displays, including a calendar grid. Read more about the YaleSites Calendar Feature
Yale Bedework Calendar and Feature
The Yale Institutional Calendar (calendar.yale.edu) is developed using the Bedework calendar system that conforms to current calendaring standards. Events are hosted on a centralized server so that events can be shared across many platforms including YaleSites. Read more about the Yale Institutional Calendar.
- The YaleSites Bedework Calendar Feature allows you to pull events from your existing Yale Institutional Calendar so they can display on your YaleSite. This eliminates the need to enter the events in 2 places and provides you with a uniform way to display your information.
Displaying Events from External Calendars
There are many groups that have external calendars other than Bedework (Google) but would like to display the events as if they were part of their YaleSite. The following options are available:
Embedding a Google Calendar
YaleSites now allows for an alternative way to showing your Google Calendar. This is the recommended procedure and allows for an easier implementation into your page using Blocks rather than installing a completely separate module.
Obtain the Google Calendar’s Source Code
- Open up your Google Calendar. On the left side of the window, under where it says My calendars click on the arrow on the right that corresponds with your calendar.
- Click on Calendar settings
- Copy the source code from the Embed this Calendar area.

Add the Source Code to your Drupal page via Blocks
- Select Structure -> Blocks from the Administrator’s toolbar.
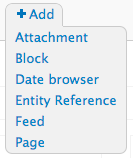
- Click on the + Add block link above the list of links.
- Enter the name of the Block in the Block title; this is shown as the title of the block to the user when placed in a Region.
- Enter a description in the Block description; this is shown on the Administration page to identify the Block.
- Select the Block body.
- Click on disable rich-text.
- Copy the code provided by Google Calendar and paste it into this box.
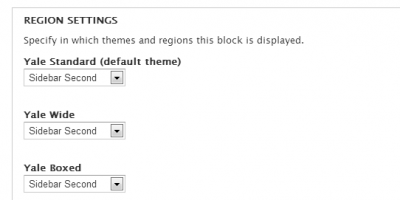
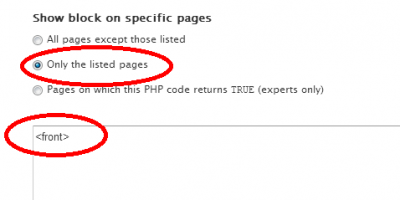
- Indicate the pages you want the block to display/not display, Content Types it should be available for, and/or the Roles who should be able to see this block.

- Save your new block.
Importing a Google Calendar using Feeds Aggregator
You can import a Google Calendar into your site using Feeds Aggregator. This imports the events in an RSS feed-like format, with very little control over how the events display.
Enabling Feeds Aggregator
- Enable the Feeds Aggregator Module.
- Select Modules, check Aggregator and click Save Configuration.

Creating a Feed
- Select Configuration > Web Services > Feed Aggregator.
- Under Feed Overview select Add Feed.
- Add Feed Title and URL for the feed you are importing (i.e. http://www.google.com/calendar/feeds/……).
- Select amount of items to import.
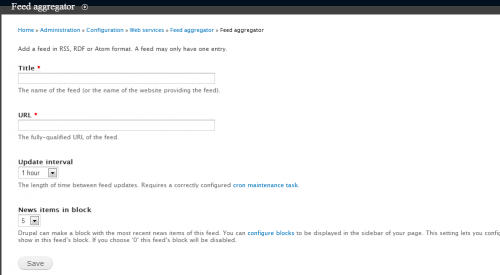
Important Note: Remember to click Update Items after creating feed or your feed will remain in 0 items until the next Feeds Pull.
You will now have a block with your issued title that can be assigned to any region within your YaleSite.
Importing a Google Calendar Feed Using the Agenda Module
The Agenda module allows you to display a list of upcoming events from Google Calendar as a block on your website. The example below provides instructions for enabling the Agenda Module and how to import your Google Calendar into your YaleSite.
Enabling the Agenda Module
- Enable the Agenda Module.
- Select Modules, check Agenda and click Save Configuration.

Creating a Feed
- Select Configuration > Web Services > Agenda.
- Select Create a New Block.
- Edit Fields as follow: [See Screen Capture]
- Administrative title: Desired title for block.
- Agenda start: “now” – This will only include events that have not yet started.
- Agenda end: “+% months” – This will display any events that occur in the next entered months. Replace “%” with desired number.
- Dates to display: Enter desired number of events to display.
- Maximum number of events to fetch: Enter desired number of events to import.
- Date formatting: Specify the date format.
- Time formatting: Specify the time format.
- Text to display if no events are found: Use Default
- Calendar link text: Use Default
- Amount of time to cache event data: Use Default
- Display fields: Comma separated list of fields to display in the event summary.
- Hide labels: Comma separated list of fields for which the label should not be displayed.
- Google Calendar IDs: The IDs of each google calendar you want to display.
- Timezone: The timezone identifier
- Save Settings.
Assigning Block to Region
- Go to Structure > Blocks
- Find block named “Agenda: YourBlockName” and select Configure
- Assign block to desired region.
- Specify what page the block should show in.
- Save Configuration.
Applying Style to Block
To attach a style to the Agenda Module you need to create a CSS Injector Rule. If you do not have CSS Injector, see instructions on Enabling CSS Injector.
Apply the Following CSS Rules:Agenda Module CSS Styiling
Note: Copy and paste the code from these files into separate CSS Injector rules.
iCal Feed - Importing a Google Calendar
Many organizations or departments store and display their events in external calendars such as Google Calendar, but want to display those same events on their YaleSites. To avoid duplicating effort and entering the events in 2 places, you can import the Google Calendar using an iCal feed.
Necessary Modules
In order to import using iCal, be sure you have the versions of the following Module on your YaleSites. If you have a lower version, please request a Refresh my site and the latest Modules will be updated on your site.
- Feeds 7.x-2.0-alpha8+33-dev (or higher)
- Feeds Admin UI 7.x-2.0-alpha8+33-dev (or higher)
- Date iCal 7.x-3.1 (or higher)
Creating the Feed Importer
The feed importer indicates the type of feed you are creating and allows you to map the fields from the importer (Date, Location, Description, etc.) to the fields in the Event Content Type.
- Enable the Feeds Admin UI Module (the Feeds Module and Date iCal are enabled as part of your YaleSite).
- Select Structure > Feeds importer > Add importer. The following dialog displays:

- Give the importer a Name and Description and click Create.
- Click on Settings where you will enter the Basic Setting. Attach to Content Type: Use standalone form and turn Periodic Import to Off. Click image to enlarge; most should remain the same:
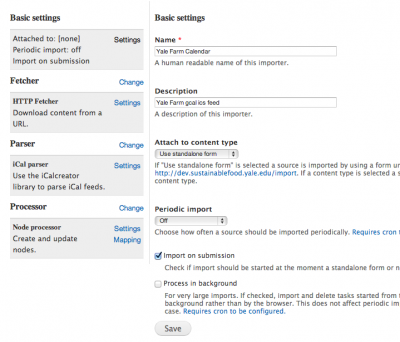
- Be sure to Save.
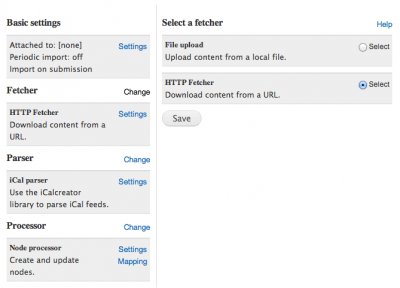
- Click on Change next to Fetcher and click on the HTTP Fetcher radio button to match the image below and click Save (click image to enlarge).
- Click on Change next to Parser and select iCal parser. Click Save (click image to enlarge).
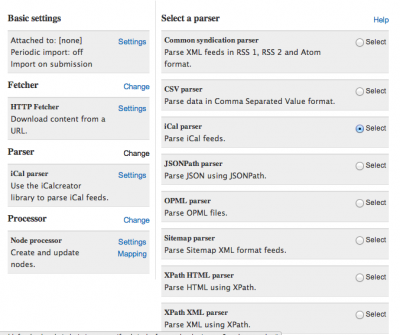
- Click on Change next to Processor. Be sure the Node Processor is selected (this is the default).
- Click on Settings next to Node Processor.
- Select Event as the Bundle, Filtered HTML as the format.

- Map the fields as demonstrated in the image below. Remember, the fields being imported are limited to the fields that are coming in from the iCal feed.


iCal Feed - Exporting Events
If you are using the YaleSites Calendar feature, site visitors might want to add your events to the calendar on their phone, google calendar etc. As the site administrator you might want to import your events from another calendar such as a Google Calendar. In order for this functionality to be available as part of your Calendar Feature, you must create an iCal (or iCalendar) feed and attach it to your calendar or the individual events on your calendar.
iCal is an Internet file format that allows you to do just that, share events on your calendar between various calendar products used by your site visitors. There are 2 main ways you might want to share information on YaleSites Calendar:
- Importing events into the calendar from other calendars - Google Calendar, etc.
- Exporting events from your calendar to other calendars on various devices – phone, tablet, etc.
This tutorial will provide you with instructions for adding the iCal feed to your calendar or individual event so site visitors can import your events to their calendars, and importing events from external calendars, in this case a Google Calendar.
Important Note: if you are importing your events from the Yale Institutional Calendar (Bedeworks) you can use the pre-built feature. Instructions can be found here.
Enable Necessary Modules
The first step is to enable the necessary Modules.
- YaleSites Calendar Feature – by default this is already setup.
- Date iCal
Creating an iCal Feed for Your Calendar
Create a Custom Display Setting on the Events Content Type
All Content Types allow you to create custom displays so you can show/hide and arrange fields for the unique requirements of that display. Once you have enabled the Date iCal module, a Custom Display for iCal is available.
- Structure > Content Types > Event > Manage Display
- Scroll down to the gray Vertical Tabs
- Click on iCal
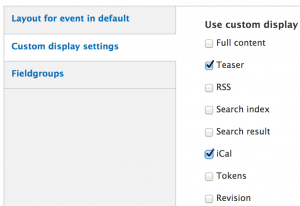
- Scroll back up to the top, still in Manage Display tab and you will now see an iCal button.

- Click on it and arrange the fields you want to display in the top section and in the order you would like them.


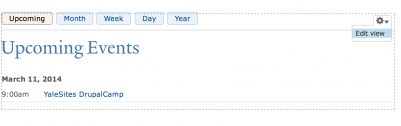
Create the Feed Display in the Calendar View
- Click on the Calendar link in your Main Menu to view the YaleSites Calendar Feature.
- Hover over the right corner of the page to expose the gear icon. Click on edit View.
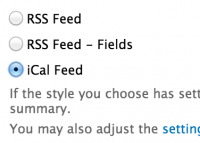
- Click on the +Add button in the display listings and select Feed. A new Feed Tab displays in the listing.

- Click on the link Format: RSS Feed and change to iCal Feed, then click Apply.
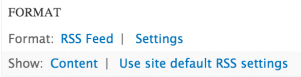
- Add the Calendar name to the settings.
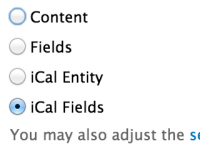
- Click on Content and choose iCal Fields, then apply.
- Map the field names in the following way:
- Date Field = Event type Start Date
- Summary field = Body
- Location field = Location
- Click on Apply
- Scroll down to Filter Criteria and set the to include Content: Type = Event
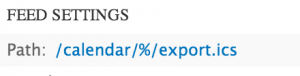
- In the Feed Settings section (middle pane), set the path to ‘calendar/%/export.ics’, including a /%/ for the Contextual Filter.
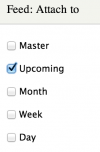
- Click on the link next to Attach and select the display(s) you want to attach the standard iCal feed icon to.
- Make sure the Pager options are set to ”Display all items”.

iCal Feed - Add Individual Events to External Calendars
Creating an iCal feed for your full calendar, but you might want to allow site visitors to add individual events to their calendar. To do this, you must add contextual filters to the view and another display to create the link for each event.
Creating the Contextual Filter
Create a Contextual Filter for the NodeID
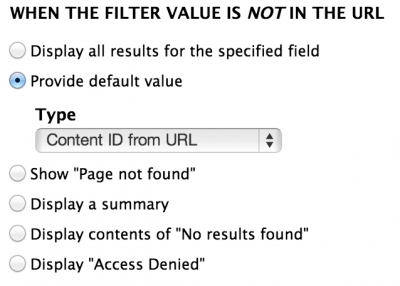
- On the view from the previous instructions, set a Contextual Filter to Node ID.
- Provide default value of Content ID from URL.
- Create a Block display in the View and set the Contextual Filter to be the same as the one above.
- Remove all the fields from the Field listing and add a Global: Text field.
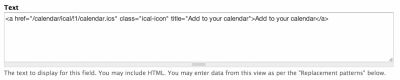
- Enter the following text in the field (click on image to view larger image)
<a href=”/calendar/ical/!1/calendar.ics” class=”ican-icon” title=”Add to your calendar”>Add to your calendar</a>
- Go to your blocks listing and assign the block to the Content regions; restricting the display to only show on Events pages.

Social media
There are several modules that allow you to incorporate social media into your site.
- The ShareThis module is enabled by default and displays buttons for Facebook, Twitter, email and other social media sites. This can be customized with your choice of social networks and you may specify what pages this block should appear on.
- The Twitter Block module offers an easy way to display a Twitter feed right on your website.
Embedding a Google Map
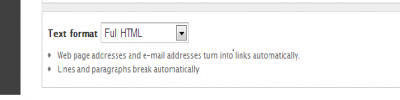
You can embed a Google Map into your page without having to install a separate module. This is done using the Full HTML capabilities of the Text Editor and pasting the iframe code right into your Body field.
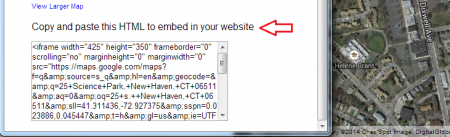
Obtain the Google Map’s Source Code
- Search Google Maps for address.

- Click Share and Embedded Map to get the embed code.
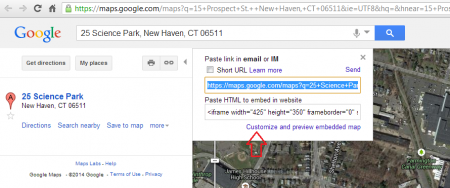
- Copy HTML code to embed into Drupal Page.
Adding Google Map Source Code to your page.
- Once you have selected the page for the map click Edit.

- In the Text Format select Full HTML. Alternatively, select the source button.

- Paste the code into the body area.
- Click on the Save button.

You should now have a Google Map in your content area pointing out your location as well as give people the opportunity to get Directions and more.
Adding Drop-down Menus
YaleSites now provides the ability to create drop-down options from the Main Menu using the Superfish Module. The instructions are intended for use with YaleSites Templates and provide you with the necessary steps to ensure your menus display properly in browsers and modern devices, including iPads, mobile and tablets. The CSS included ensures the menus are styled and colors coordinated with the chosen highlight color.
Configuring Superfish | Configuring the Block
- Enable the Superfish module - Modules > Superfish.

- Configure the Superfish Module
- Configuration > User interface > Superfish

- Set the number of blocks to 1. DO NOT change the default Paths.
- Configuration > User interface > Superfish
- Configure the Superfish 1 Block
- Click on configure to the right of the Superfish Block.
- Set the block title to <none>.

- Scroll down to Superfish Settings.
- Leave the Style selector set to –None-.
- then and change ONLY these settings.
- Deselect Drop Shadows.

- Scroll down and click on Advanced and change the Mouse Delay to 300 milliseconds.
- Deselect Drop Shadows.
- Superfish Plugins
- Enable HoverIntent, but disable the other checkboxes.

- Click on the 4th radio button Enable jQuery sf-Touchscreen plugin for this menu depending on the user’s Web browser user agent to enable the plugin depending on the detected user agent.
- Under Select Behavior, select the 1st radio button for Opening the Parent menu item on the second tap.

- Click on Window Width Settings, change the breakpoint to 740 pixels.

- Scroll down to SF-Smallscreen plugin. The radio button enabled should be jQuery sf-Smallscreen plugin for this menu depending on the user’s Web browser window width.
- Enable HoverIntent, but disable the other checkboxes.

- Scroll down to Supersubs and uncheck to disable the Supersubs.

- Replace the Main Menu Block with the Superfish Menu Block.
- Go to the Blocks listing page - Structure > Blocks
- Locate the Superfish 1 block under Disabled and assign it to the Menu Region.
- Disable the Main Menu block that’s in the Menu region by default.
- Scroll down and Save the listing changes.
Theme Adjustments
Once you have your Superfish Module enabled, you must disable one of the default Libraries in your YaleSites Template settings for the SF-Touchscreen plugin to work correctly. This should be done in the main theme settings for the YaleSites Template you are using (Boxed, Standard, or Wide) as well as the Home Page Deltas.
- Click on Appearance in the Toolbar.
- Click on the Settings link below the default theme you are using (in this example we are using the Yale Boxed Template Theme.
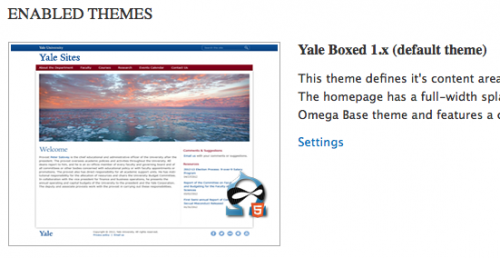
- Click on the Toggle Libraries tab and deselect the FastClick option.

- Now do the same thing on the Delta for the home page.
- Select Appearance > Delta
- Click on Configure for the Delta related to your YaleSites Template (in this example we are using the Yale Boxed Template)

- Repeat step #3 above.
Further Explanations on what the other settings do
- The SF-Touchscreen plugin allows the menu to respond to “tapping” on link items with a smartphone. When testing with a desktop browser the sub-menus still open up when hovering over the parent menu items. There are different “tap” behaviors you can select from.
Note: unlike iOS, some Android devices do not interpret a screen tap as a mouseover or hover. This plugin patches Android devices to allow screen taps to fire the flyout menus. It also lets you tap once to open the flyout, then tap a second time to fire the parent menu link. - The SF-Smallscreen plugin swaps out the regular menu with a new one. When you choose “Convert to select element” the entire menu is replaced with a select element. When you choose “Convert to Accordion” a new Menu button is added to the top that reveals the replacement mobile nav menu. This is already built into the YaleSites theme so it’s an unnecessary duplication.
Drop-Down Arrows for Expandable Menu Items (2016 Standard Theme)
Menu drop-down arrows can be helpful to visually identify which menu items can be expanded to reveal more list items without the need for interaction. The Superfish menu has a built-in drop-down arrow function although it is not visible within the YaleSites 2016 Standard theme without additional customization. This can be resolved with the following CSS:
/*(1)Hides arrows from main nav bar--->*/ ul.sf-menu > li > a > span.sf-sub-indicator {display: none;}
/*(2)Replaces white .PNG arrow asset with black forward .SVG--->*/ .sf-sub-indicator {background: url("data:image/svg+xml,%3Csvg xmlns='http://www.w3.org/2000/svg' viewBox='0 0 26 26'%3E%3Cpath d='M15.405,13L6.821,4.236C6.438,3.845,6.442,3.217,6.829,2.83l1.536-1.536c0.391-0.391,1.026-0.39,1.417,0.002l10.925,10.997 C20.902,12.488,21,12.744,21,13c0,0.256-0.098,0.512-0.293,0.707L9.782,24.704c-0.39,0.393-1.025,0.394-1.417,0.002L6.829,23.17 c-0.387-0.387-0.391-1.015-0.008-1.406L15.405,13z'/%3E%3C/svg%3E%0A");}
- Main nav menu - use this rule to hide the arrows from the main navigation menu which don’t always align correctly.
- Replace arrow asset - use this rule to replace the white arrow .PNG with an embedded black .SVG.
Creating an Image Upload Content Type
There are times when you need a place to store an image for another application or email. This is often the case for Bedeworks Calendar where you want to add images to the header. Do to this, you need to:
- create a Content Type that allows you to upload the image to your YaleSite
- create a View that allows you to display the images you uploaded, and get the URL from that display.
You can either create the View manually or download the following files and import them.
Create the Content Type and View Manually
- Use the basic instructions to create the Content Type, adding only an image field. Creating custom content types and fields
- Use the basic instructions to create the view that lists all the images you have uploaded. Displaying content with views
Importing the Content Type and View
Rather than recreate the structures you can use the following instructions to import the Content Type and View (Reusing content types and views). Upload the following files.
Getting the URL for the Image
To get the URL for the image to use in the other application or email, simply click on the image and copy the URL from the browser location field.
Adding a Banner Menu
A Banner Menu allows you to have a secondary menu located above the primary Navigation Menu. This menu can be used for affiliate links, Intranet Links within your site, or Special Content Links. YaleSites already has pre-created content region named Banner Menu where it can be assigned.
Adding Menu
- Pull up the Menu Administration page by selecting Structure > Menus
- Select Add Menu and name it Banner Menu and Save menu

Adding Links to Banner Menu
Under Banner Menu select List Links

Select Add Link

Add Menu Link Title and Path (URL)
Note: Make sure Parent Link is set to <Banner Menu>. This will guarantee links show in Banner Menu.

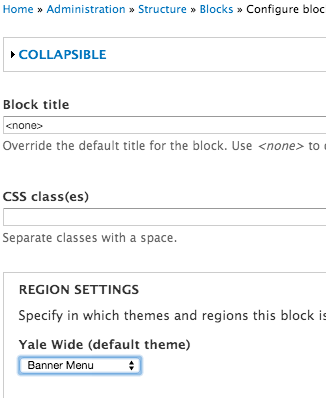
Assigning Block to Banner Menu Region
You should now see a block named Banner Menu if you go to Structure > Blocks. You can now edit the block and assign it to the Banner Menu region.
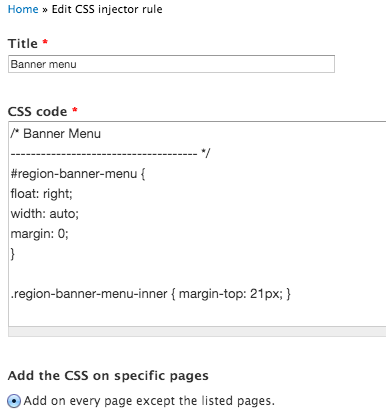
Applying CSS Style to Banner Menu
Using CSS Injector, insert the attached CSS Rule. This will style the menu to match the YaleSites Template.
- Select Configuration > Development > CSS Injector
- Select Create a New Rule and name it Banner Menu CSS
- Insert CSS into rule and Save
Adding an Image Map or Hot Spot
Image Preparation
- Using FireWorks or other image preparation software, create the image you want to map as a jpeg, png, or other web-friendly format.
- Save the image to your local computer disk.
- Create a new Block and upload the image.
- Assign the Block to the Region and page location.
Prepare Image Map Setup
- Use the instructions provided by Adobe to create your image map file:
- Fireworks (Yale Subscription): Hotspots, image maps, and rollovers
- GIMP (free): 14.2 ImageMap
- Export the image map and open the HTML page that results in the export.
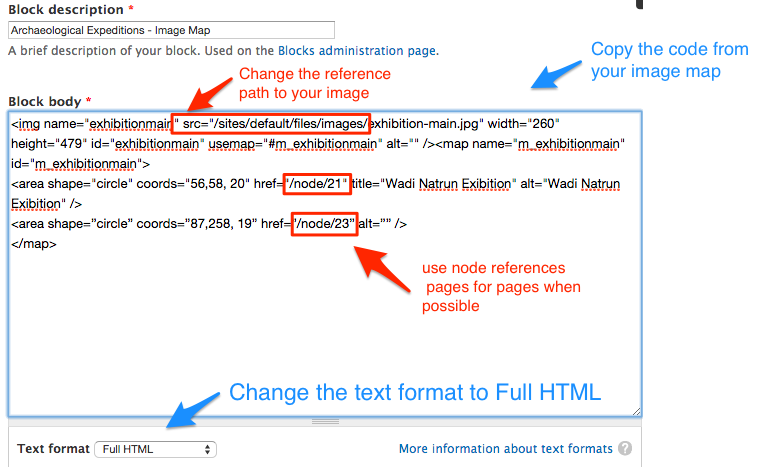
- Open the Block created in step #3 above.
- Change the text format to Full HTML
- Copy the Image map code from the HTML page into your Block, changing the image page to include the base path for your site (just add text that it bold).
<img src=”/sites/default/files/images/exhibition-main.jpg” width=”260” height=”479” usemap=”#m_exhibitionmain” alt=”” />
-
Make sure the references to the page are relative and do not include the full URL. Using the node reference is best in the event that the page name changes (and therefore the URL).
<map name=”m_exhibitionmain” id=”m_exhibitionmain”>
<area shape=”circle” coords=”87,258, 19” href=”/node/23” alt=”” />
<area shape=”circle” coords=”56,58, 20” href=”/node/21” title=”Wadi Natrun Exibition” alt=”Wadi Natrun Exibition” />
</map> -
Save the Block. This should work on phones, tablets, etc.
Audio and Video
YaleSites provides several ways to add Audio and Video content from external streaming services. Regardless of the method used, it is important to know that all Audio and Video files must be stored by a 3rd Party service such as Vimeo, YouTube, or SoundCloud. YaleSite provides Modules to pull the media into your site, however, you must store your files in a YouTube, Vimeo or SoundCloud account in order to use this module.
Broadcast Media Center has further information on how to distribute audio/video content through Yale official channels. If you do not have or wish to have your own account, please contact Yale Broadcast to request hosting your files on Yale Partner’s Umbrella.
Recommended External Media Providers
- Audio - SoundCloud
- Video - Vimeo or YouTube
As additional media providers become available we will work on making these accessible via YaleSites. Please contact the YaleSites team with suggestions.
Adding Audio and Video to Your YaleSite
You can either embed Audio and Video through the WYSIWYG toolbar or use Content Types and Views for more control in the presentation to create lists or featured blocks.
YaleSites Video Feature - provides the basic Content Type and Views you need to start displaying your Videos hosted on Vimeo or YouTube.
SoundCloud Audio Field - allows you to create a SoundCloud field in a custom Content Type so you can display your audio in a list Block view display.
Privacy Information
Each of the recommended providers allow you to control access to who sees your media.
SoundCloud (https://soundcloud.com/)
Privacy Options:
- Public sharing means that anyone can listen to your sound, and it will show up on your profile page.
- Private sharing is exclusive, giving you control over who has access to your tracks and who doesn’t. Private tracks won’t show up on your public profile and can’t be searched for within SoundCloud.
Vimeo (https://vimeo.com/)
Privacy Options:
- Anyone - Allow anyone to see this video.
- Only me - Make this video visible to me and no one else
- Only people I follow - Make my videos visible only to people I follow on Vimeo
- Only people I choose - I’ll select people with whom I want to share this video (only works with other Vimeo members)
- Only people with a password Protect this video with a password (Share password* protected videos with non-Vimeo members)
- Hide this video from Vimeo.com (Plus + PRO only) - I want to post this video on the web but don’t want it to be available on Vimeo.com. (This will hide your video on Vimeo.com and remove it from public Albums, Channels, and Groups.)
Embedding:
- Anywhere - Enable people to embed this video on any site
- Nowhere - Do not allow anyone to embed this video
- Only on sites I choose (Plus + PRO only) - I’ll specify sites on which people can embed this video
YouTube (https://www.youtube.com/)
Privacy Options:
- Public – can be seen by anyone
- Unlisted – doesn’t show up on YouTube, but anyone with link can see them
- Private – visible only to users you select via Google+, requires Google account to watch
Creating a Rotating Text Block
This tutorial will demonstrate how to create a rotating text block by creating a Custom Content Type and View. This will provide you with the basic information necessary to better understand these 2 foundation concepts when building a site using YaleSites or Drupal.
Creating a Custom Content Type
Content Types are used to capture data for your website. While Drupal provides some basic Content Types, it is often necessary to create custom content types to capture the various types of content that are unique to your site. This tutorial will provide you with the basic understanding to create a Custom Content Type.
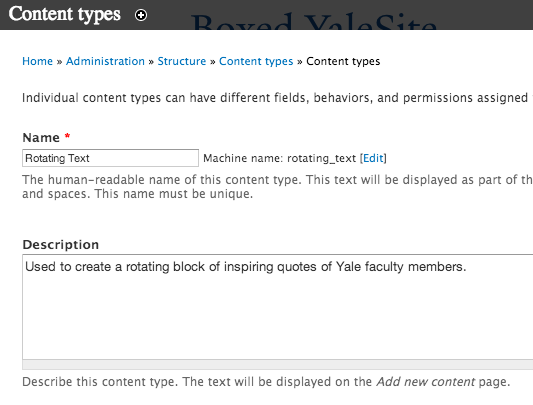
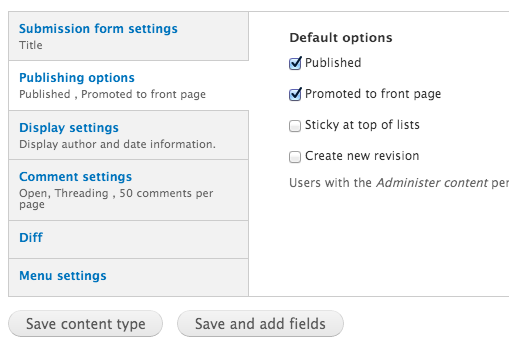
- Select Structure > Content Types > Add Content Type from the administrator’s toolbar.
- Enter the name of your Content Type and a descriptions (optional).

- Scroll down and click on Publishing Options. Change the settings as desired. It is important to note that Promoted to the front page will add the page to the default RSS feed that is part of your YaleSite (http://yoursitename.yale.edu/rss.xml).

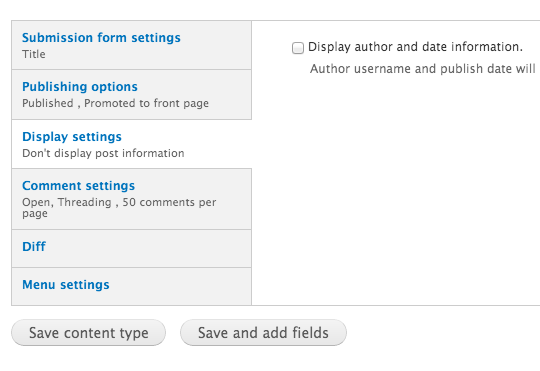
- Click on Display Settings and uncheck Display author and date information. This prevents the authors name and creation date from showing up at the top of the page.

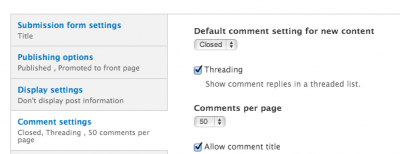
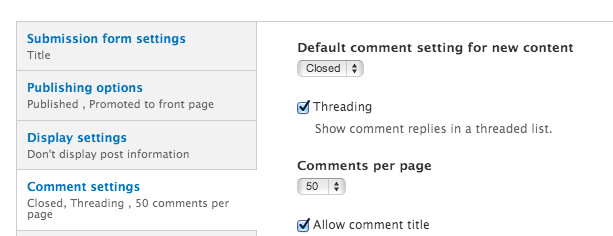
- Click on Comments Settings and set to Closed. This must be done when creating the Content Type.
- Click on Save and add fields to continue.
Adding Fields to a Custom Content Type
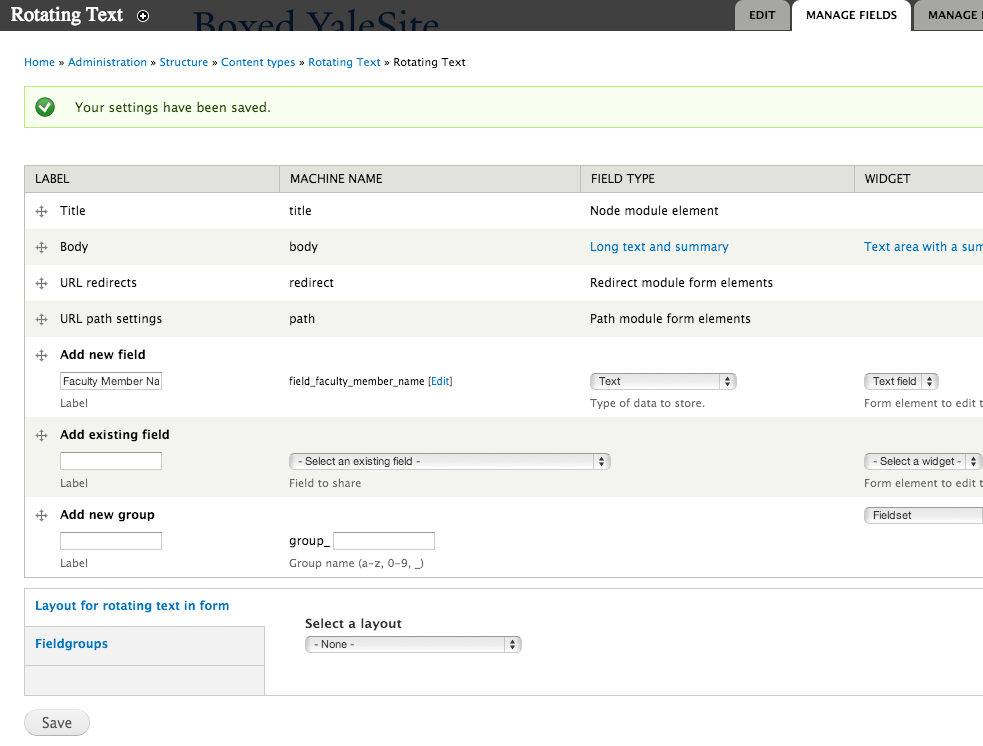
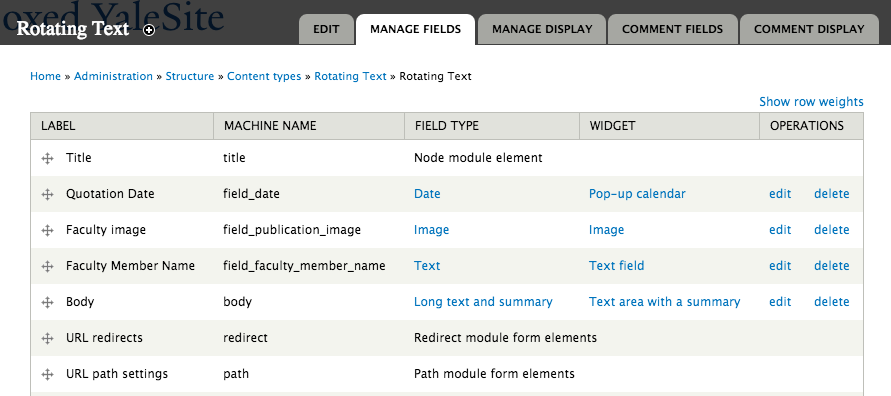
Once your Content Type is created, you can create additional fields to refine the data that you are capturing. In this example, we’ll add 1 new field - Faculty Member Name and use 2 fields that already exist on other Content Types for your site - Date and Image.
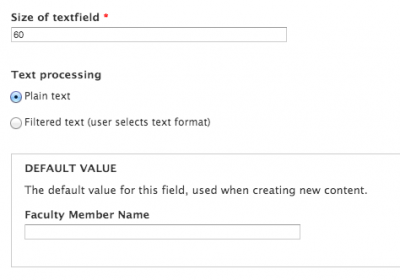
- In the field listing, click in the Add a new field section and add the title of your field. Then select Text from the Select Field type dropdown. The widget defaults to Text.

- When you click on the Save button you will be asked to configure the text field settings.


- Add a Date field, selecting one that already exists.

- Configure the date field if you want to change what already exists.
Change the label and add help text.
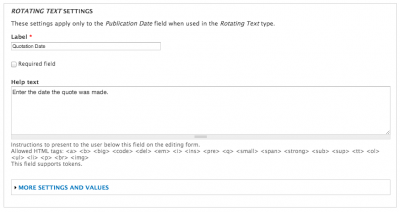
Change starting and ending years and time increments.
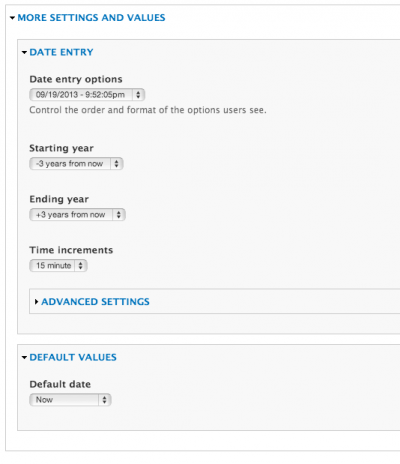
Changes to this section will affect all instances of the field on the site.

- Adding an image using an existing field.

Change the label and add help text.

Set image sizes and caption/alt text.
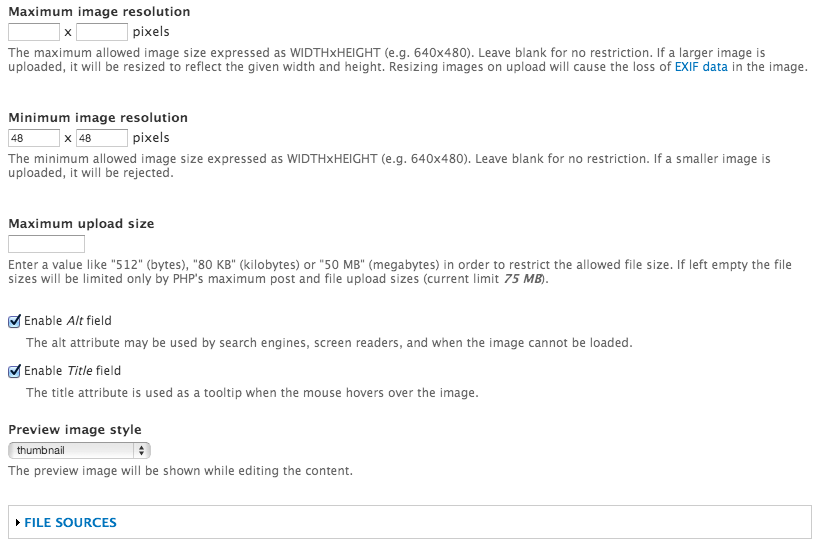
Changes to the field settings will change the Image field for each instance.
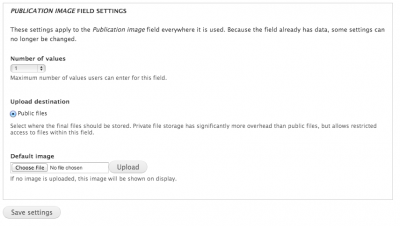
Click on Save settings.
Your field list should look like this.
Creating the Rotating Text View
Once your have Content Type created, you can begin to create the View that will rotate each quote using transitions to move from one to the next.
- Enable the Views Slideshow and Views Slideshow Cycle Modules.
- Select Structure > Views > Add new view from the administrator toolbar.
- Create a new view following the image below.
Create a page (list of quotes) and block display using the Slideshow format.

- When you click on Continue & Edit you are brought to the Views interface. This can seem a little intimidating until it’s broken down into smaller chunks.

- Add and configure Faculty Member, Body, and Date fields


- Rearrange the order of the fields; click on the Add icon and select rearrange.

- Add filters to determine what types of content will display and in what order.


Migrating Content from One Site to Another
We get a lot of questions asking how to migrate data from a D6 YaleSites to D7 or from other web formats (HTML or other CMS). At this time, there is no direct method to migrate content, however, much of the data can be migrated using the Feeds Module. With a little preparation, this process can provide a relatively painless way to facilitate moving the content from one location to the other.
Feeds Module pulls data from a feed or file into a Content Type with fields that match data structure being imported. When configuring the Feeds module, the fields are mapped so the data is available in the correct fields the field names in the file are mapped to the fields in the Content Type.
**Important Note: some of the techniques in this tutorial require advanced knowledge i.e. creating Custom Content Types, Views, Excel Macros etc.
Real World Example
You have a page that lists the department names, chairs, phone and fax numbers. You will need a comma delaminated text file and Content Type with those fields. The Content Type needs to be structured with the same fields as the data that is being imported.
The text file would be structured like this:
- department,chair,phone,fax.
The Content Type would require the following fields:
- Department
- Chair
- Phone
- FAX
Step 1 - Preparation of Data
Before you can import the data you must do the following:
- Get the data you want to import into your site into a format that can be imported - in this case a CSV file.
- Create the Content Type that the data will be imported into.
Getting the Data into a CSV File
In order to import the data, the content needs to be in a format that can be read by the Feeds importer – in this case a CSV file which is a text format that can be generated with an Excel spreadsheet. If the data is already in table form, where each field is in its own column, you can copy and paste it from the web page directly to an Excel Spreadsheet. If not, you will need to do some configuration to ensure the data can be mapped to the fields in your content type. Important Note: If you do not have a unique field in your listing, you will need to create a GUID field/column to ensure no overlap of data.
Creating a View with Tabular Data**
If you are importing from another YaleSites (D6 or D7) you can create a page display in a View using the Table format, where each column contains a where the data displays. Be sure to set the view to display all records.
|
Department |
Chair |
Phone |
FAX |
|
English |
Michael Warner |
203-432-2233 |
203-432-7066 |
|
Physics |
C. Meg Urry |
203-432-3650 |
203-432-6175 |
Creating the Content Type**
The Content Type is where the data is transferred with the fields module. For each column in your table/or text field, you need to have a field where the data ultimately will live. For this example, we would create a Content Type with the following fields:
- Department – Text Field
- Chair – Text Field
- Phone – Text Field
- FAX – Text Field
Step 2 - Creating the Importer
- Enable the Feeds Admin UI Module (the Feeds Module is enabled as part of your YaleSite).
- Select Structure > Feeds importer > Add importer
- Give the importer a Name and Description and click Create. The following dialog displays:

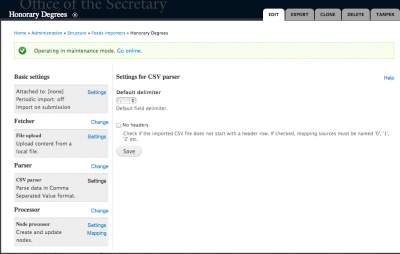
- Click on Settings and change the settings to match the image below and click Save (click image to enlarge). Most should remain the same:

- Click on Change next to Fetcher and click on the File Upload Select radio button to match the image below and click Save (click image to enlarge).

- Click on Settings next to File Upload and change the Allowed file extensions if desired and click Save (click image to enlarge).

- Click on Change next to Parser and click on the CSV Parser radio button to match the image below and click Save (click image to enlarge).

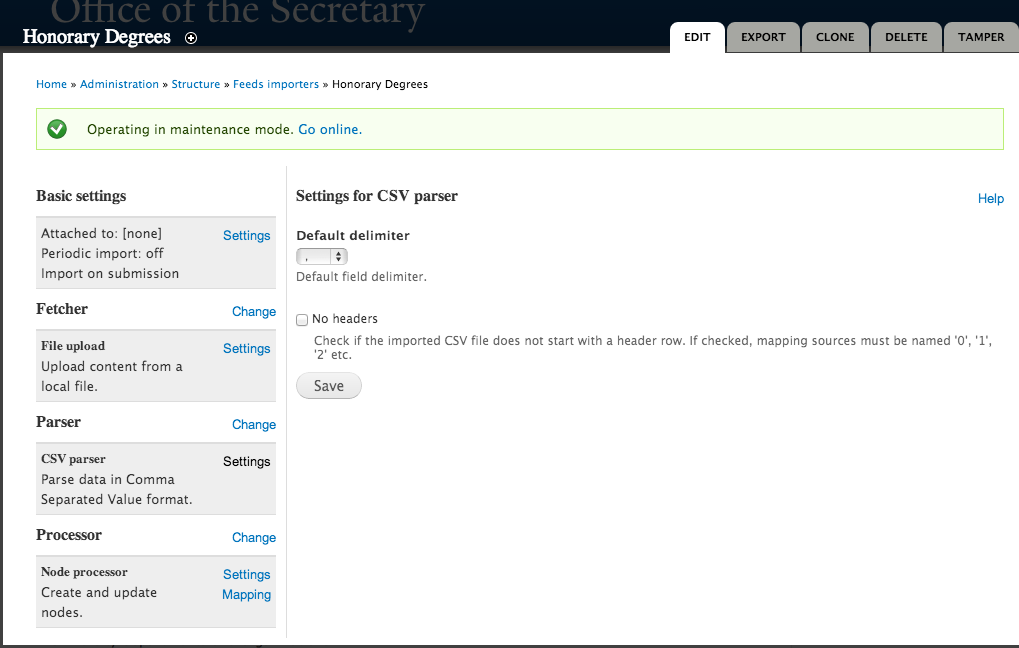
- Click on Settings next to CSV Parser – DO NOT CHANGE ANY OF THESE SETTINGS. (click image to enlarge).
- Click on Change next to Processor and click on the Node Processor Select radio button to match the image below and click Save (click image to enlarge).

- Click on Settings next to Node Processor and adjust based on the image or personal preferences. (click image to enlarge). Important Note(s): In the Content Type field, be sure to select the Content Type you want to import the data into. Be sure to change the author from Anonymous to someone in your group (type the first few letters to produce a list of available people).

- Click on Mapping next to Create and update nodes. This is where you will “map” your fields in the Content Type - TARGET with the data from your CSV file - SOURCE (click image to enlarge)
- Select a target or field that is part of the Content Type indicated in Step 10.
- Enter the name of the column from the CSV file that contains the data you want to go in that field.
- Be sure to incorporate a GUID as the unique identification number to ensure data does not get overwritten. You must have a unique field in your CSV file (Email, Title, URL sometimes works). If you do not, just create a new column, with a title of GUID and create a unique number for each entry by dragging down with the fill handle.


Step 3 - Import the Data
Once you have created your importer and your CSV file is all set, you just need to import the data.
- In the base URL of your site, enter import after yale.edu (http://yoursite.yale.edu/import).
- Click on the name of the importer you just created and the import dialog displays:
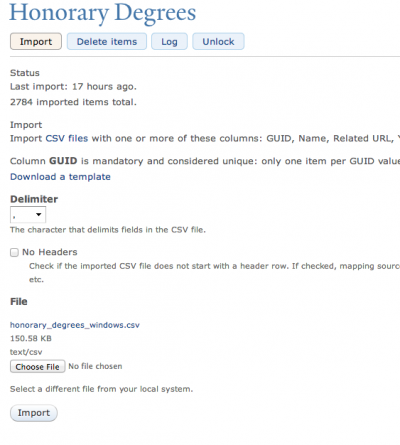
- Click on the Choose file button and upload the CSV file.
- Click on the Import button and your data is imported.
- Go to the Content listing, filter by your Content Type and you should see a new “page” for each record imported.
When Feeds Import Doesn't Work
OK, you’ve created the importer and prepared the data. You click on the Import button and nothing happens - either no records are imported or only a partial list was imported. This is actually very common because the data needs to be cleaned up a little so that is can be read by the database. Here are some things you can do to ensure that your data gets imported quickly and accurately:
Feeds Tamper Module
The Feeds Tamper Module allows you to adjust content that a feed is importing before it is saved. When enabled, the Feeds Tamper Module provides a variety of plugins that help to “purify” the data before it is imported by decoding or encoding HTML characters, stripping HTML, changing the case of characters and many more. See the Full List of Plugins for existing plugins.
Removing Gremlins or Unwanted Characters
Gremlins are are unwanted characters that you can’t see but the database can (and it doesn’t like them). This is very frustrating because you can’t “see” the problem in your basic text or CSV file; but the import will stop when the database gets to the first hidden character. In order to avoid this, you need to remove the gremlins/unwanted characters before you import the file:
MAC
- Open the CSV file using the TextWrangler program. Select Text > Zap Gremlins. You will be asked to replace it with another character. It is recommends you just press the spacebar to replace the character with a space.
- If you want to view the characters prior to zapping them, select View > Text Display > Show Invisibles. Your text document will display the characters.
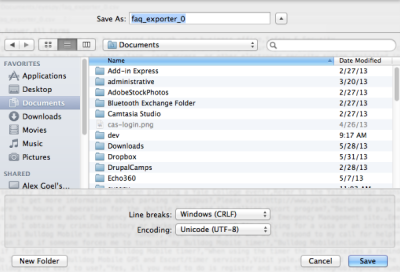
- Save the file as Line breaks: Windows (CRLF), Encoding: Unicode (UTF-8)
PC
- To view the characters prior to zapping them, select View > Show Symbol > Show All Characters. Your text document will display the characters.
People Directory - Manual Listing
Many sites want a people directory on their site, but the people they want to add do not have a NetID or the full People listing is overkill for what they are looking for. If you are interested in a lighter weight People Listing, you can create a People Directory in the following way.
Enable Modules
In order for this feature to work, you must enable the following modules:
Create the People Directory Nodequeue
- In order to control the order of your People directory, you will need to create and configure a nodequeue. (see instructions for Nodequeue)
Import Content Types and Views
Download the attached .zip file and import that Content Types and Views (see Reusing content types and views for instructions).
Important Note: When importing Content Types, the Comments and author information is not automatically disabled. Be sure to check your Content Type by clicking on Structure > Content Types > Name of Content Type and disabling the following:
- Click on Comments to ensure they are turned off.
- Click on Display Settings and uncheck Display author and date information.
Add CSS
Using CSS Injector, create a rule and add the CSS that is part of the downloaded file in the above step.