You can use the WYSIWYG toolbar to upload images that you want to use in the body area of your site.
- Create a new piece of content, then go to the Body field or any field with a WYSIWYG toolbar.
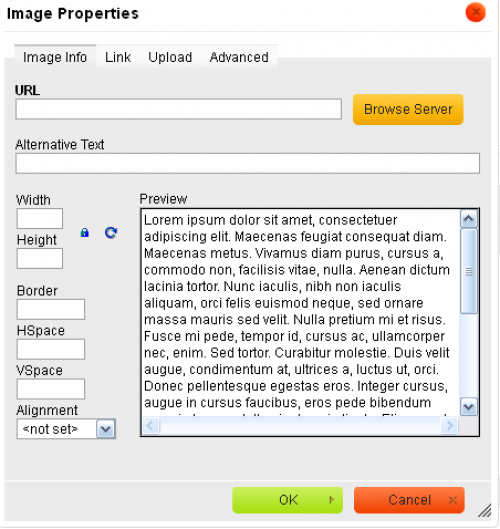
- Click on the Image icon.
 The Image upload dialog displays.

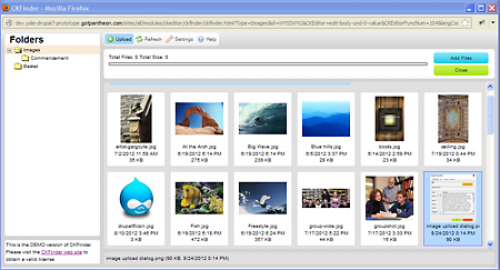
- Click on the Browse Server button. The CKFinder dialog displays.
- Click on the Upload button. The File upload dialog window opens where you can navigate to locate the images you want to upload.
- Click on the image you want to upload or hold down your Shift key to upload multiple images. The files are uploaded and available to be added to your folder.

- Locate the image in the list and double-click on it.
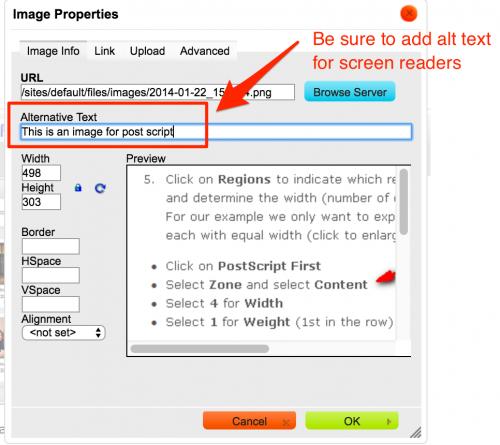
- Add Alternate Text (Alt Text) so that screen readers can identify the image for those who are visually impaired.

- Click OK and the image is added to your page in the location of your cursor.
Adding a Caption to an Image
If you want to have a caption display below your image, you can do so in the following way:
- In the Image properties dialog, click on the Advanced tab.
- Enter the text you want as the caption in the Advisory Title field.
- When you save the image and page, the caption displays below the image.