Managing People
One of the greatest benefits of YaleSites is the ability to control administrative access to your site and determine who can do what (make edits, post content, or build out the site). Anyone with a Yale NetID and password can be given access to a site by the site administrator who can assign roles with various levels of permission.
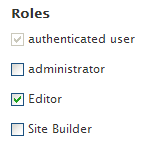
Roles
The following roles are available on your YaleSite. Additional roles may be created but most site administrators find this is not necessary.
- Anonymous: Anyone who visits your site and is not logged in.
- Administrator: Administrators have full access to the site and can perform all functions available on the YaleSite, including site performance, user management, report generation, etc.
- Site Builder: People with this role can do everything necessary to build the site; create custom Content Types and Views, add Menus and Blocks, assign them to the various regions. The Site Builder role also has permission to change the Theme or template.
- Editor: Editors have full permission to create and/or update all content and publish it live. They can also manage Menus, Blocks and Comments where applicable.
- Authenticated user: Anyone with a Yale NetID who has logged into your site is considered an Authenticated user.
To add a Role, click on People > Permissions > Role. Once done you need to assign permissions so indicate the functionality allowed for that Role.
Adding People
Most likely you (the site administrator) will not be the only person working on your site. As the Administrator, you can add people to your site and assign them a role that allows them to perform specific tasks on your site. To access commands to manage people, click on People in the Administrator’s toolbar.
Add CAS User
Anyone with a Yale NetID can be granted access to your site and, as the Administrator, you can easily add them to your site using their NetID.
Important Note: When people are added via CAS, their full name, phone, title, address, and email are pulled from the HR database.
- Click People - >Add CAS User
- Enter the NetID of the user you want to add and click the Create new account button.
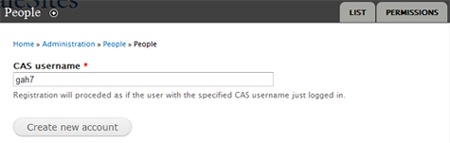
- Click on the List tab, and the person shows up on your list of people.

- Click on the edit tab in the row of the person added and assign a role based on what you want them to do on your site.
Adding Multiple CAS Users
As of June 20, 2014, you can now add multiple NetIDs to make it easier to populate your people listing. If your site was created prior to June 20, 2014 and you would like this feature, please complete the Refresh my site form.
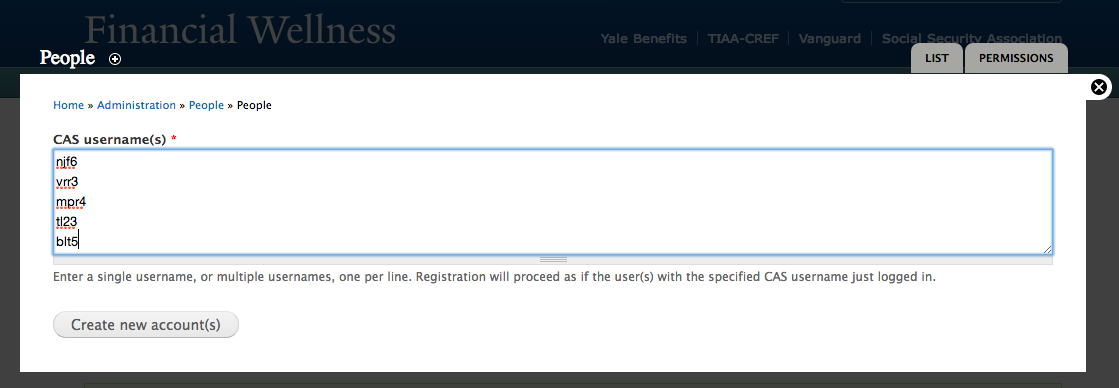
- Select People > Add CAS User(s)
- The field displays as a Text Area box rather then one line Text field.
- Enter the NetIDs one on each line.
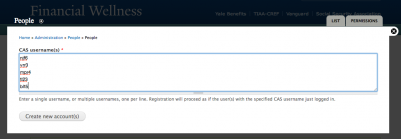
- Click on Create new accounts.
- Each person will be listed on the resulting screen with a link to the person’s account information.
Adding Roles to Multiple People
When accounts are created initially, they are assigned an Authenticated User Role. If you have a custom role, you can change it for more than one person in the following way:
- Click on People in the Toolbar.
- Select the people you want to assign the role by clicking on the check box to the left of their names.
- In the Update Options section above the people listing select the role you want to add.
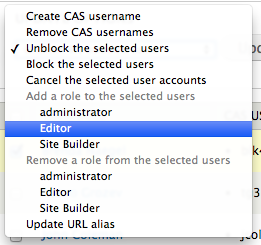
- Click on the Update button and all the selected people are assigned the selected role.
Allow People to Update Personal Account Information
If you would like faculty or staff to complete their own profile, you can ask them to login to the site and update their information in the following way*:
- Email the people and request they access your site through following URL: yoursitename.yale.edu/cas (replacing yoursitename with the name of your department or organization).
- Once they login to the site, they will see the User Menu under the right navigation of the home page:
- Instruct them to click on My account and complete the form that follows. Keep in mind that the first name, last name, phone, address, and title auto-populate from the HR database when someone logs in. This can be adjusted and additional fields can be added to customize the information you capture.
* You must have the Yale People Listing Feature enabled and the People Type selected in order for these people to show up in an organized list.
Changing Roles
Once you have added a person to your site, you can assign and/or change roles for anyone logged into your site:
 Click People in the Administrator’s toolbar and then the edit tab in the row of the person you want to assign/change the role.
- Change the role by clicking on the appropriate radio button/check box.
Blocking a User
 There may be times when you want to block someone from your site because they have left the University or are exhibiting behavior that warrants removal (spamming a forum or posting inappropriate comments, for example). You can easily block them by clicking on the Block radio button on their profile page:
Permissions
Permissions control who does what on your site. Your YaleSite has a predefined set of permissions for all the modules and features available with the basic setup. In addition, each module that is enabled has its own set of default permissions. All permissions can be changed based on your site requirements and who you want to allow to work with the module.
To review and/or change permissions, click on People > Permissions. Permissions are enabled for a role by checking the checkbox below the role.
Below you see an example of the permissions for the Comments module, one of Drupal Core modules. The Permission identifies the tasks that require permissions for that module and the check boxes indicate the Roles that have permission to do the task
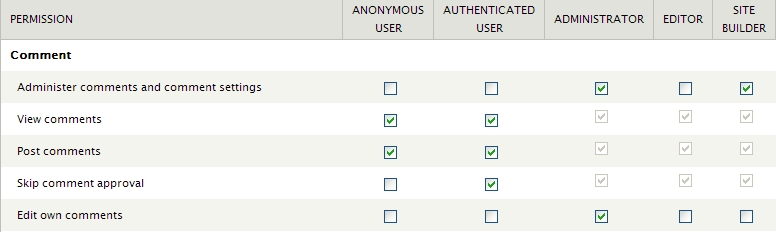
In this example:
- Anonymous users – anyone who visits the site – have permission to view and post comments, but the comments must be approved.
- Authenticated users – anyone who has logged into the site – can post comments without approval.
Third Party Authentication
YaleSites now offers ability for people without a Yale NetID to login to YaleSites with Third Party Systems (Google, Yahoo, Facebook, etc.). Although this feature is available for any YaleSite, it is not installed by default as it requires advanced technical knowledge to configure. If you are interested in this feature, please complete the Request 3rd Party Authentication form.
About YaleSites 3rd Party Authentication
3rd Party authentication allows people outside of Yale (e.g. faculty or researchers associated with a project without a Yale NetID) to login to your YaleSite through other web services (Facebook, Google, Twitter, etc.). The username and password are passed to and from these services; YaleSites does not store any passwords. Usernames and password credentials are reset using the provider’s system or can create an account if they do not have one.
3rd Party Services
YaleSites allows 3rd Party Authentication from the following services.
- Yahoo
- Microsoft
- Other providers are available upon request
Logging Into a YaleSite with 3rd Party Authentication
Once 3rd Party Authentication is enabled by the ITS Web Team, direct people to login to your site in the following way:
- Go to http://sitename.yale.edu/user
The following screen appears:
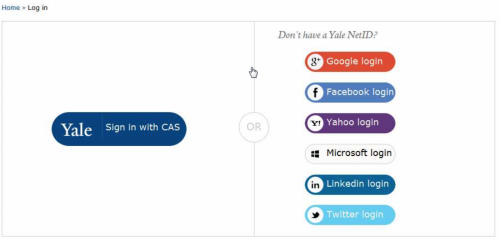
- If the person is Yale student, faculty or staff and has a Yale NetID they need to click on Yale Sign in with CAS.
- If the person does not have a NetID, they can login with any of the 3rd party groups listed on the left.
- When the person clicks on the service to authenticate with, they are then redirected to the service’s website login screen.
- The person is authenticated and redirected back to YaleSites.
- The person is now logged into the site as an authenticated user.
Assigning Roles and Permissions
Once this feature is configured on your site, you can assign Roles and permissions as you would for a person who has logged in with CAS. Please refer to the roles and permissions section of our documentation.